Autoscale for Azure Virtual Desktop

If you just use Azure Virtual Desktop after a default setup, the cost can be quite high. But with AVD you are in total control over the Hostpool and all the related resources. Thereby you can optimize the use, size and number of resources to optimize the cost. I.e. The more effort you put into it, the cheaper it will get! But the optimization can be quite hard to implement.
But lately, a new feature has appeared in the AVD portal. Autoscaling for AVD Hostpools! This new feature is in preview, but after some testing it really works good. I have seen quite good cost savings after just a default implementation.
PreReq
The tricky part is to get it up and running. To implement Autoscaling, you must first create a new admin role and assing it to the Windows Wirtual Desktop. This new role is created by the following steps:
- Open the Azure portal and go to Subscriptions.
- Select the subscription with your hostpool to autoscale.
- Select the + button in the top left-hand corner of the screen, then select Add custom role from the drop-down menu, as shown in the following screenshot.

- Next, name the custom role “Autoscale admin” and add a description.
- On the Permissions tab, add the following permissions to the subscription you’re assigning the role to
"Microsoft.Insights/eventtypes/values/read" "Microsoft.Compute/virtualMachines/deallocate/action" "Microsoft.Compute/virtualMachines/restart/action" "Microsoft.Compute/virtualMachines/powerOff/action" "Microsoft.Compute/virtualMachines/start/action" "Microsoft.Compute/virtualMachines/read" "Microsoft.DesktopVirtualization/hostpools/read" "Microsoft.DesktopVirtualization/hostpools/write" "Microsoft.DesktopVirtualization/hostpools/sessionhosts/read" "Microsoft.DesktopVirtualization/hostpools/sessionhosts/write" "Microsoft.DesktopVirtualization/hostpools/sessionhosts/usersessions/delete" "Microsoft.DesktopVirtualization/hostpools/sessionhosts/usersessions/read" "Microsoft.DesktopVirtualization/hostpools/sessionhosts/usersessions/sendMessage/action" "Microsoft.DesktopVirtualization/hostpools/sessionhosts/usersessions/read" - When you’re finished, select Ok.
- In the Access control (IAM) tab, select Add role assignments.
- Select the role you just created and continue to the next screen.
- Select +Select members.
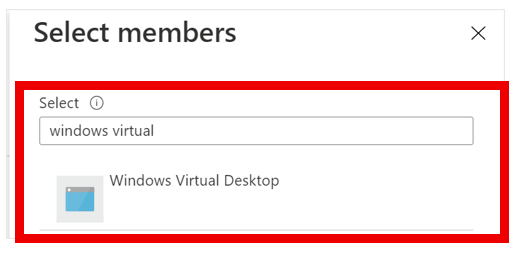
- In the search bar, enter and select Windows Virtual Desktop

- Select Review + assign to complete the assignment.
Implement AutoScale
- Sign in to the Azure portal at https://portal.azure.com.
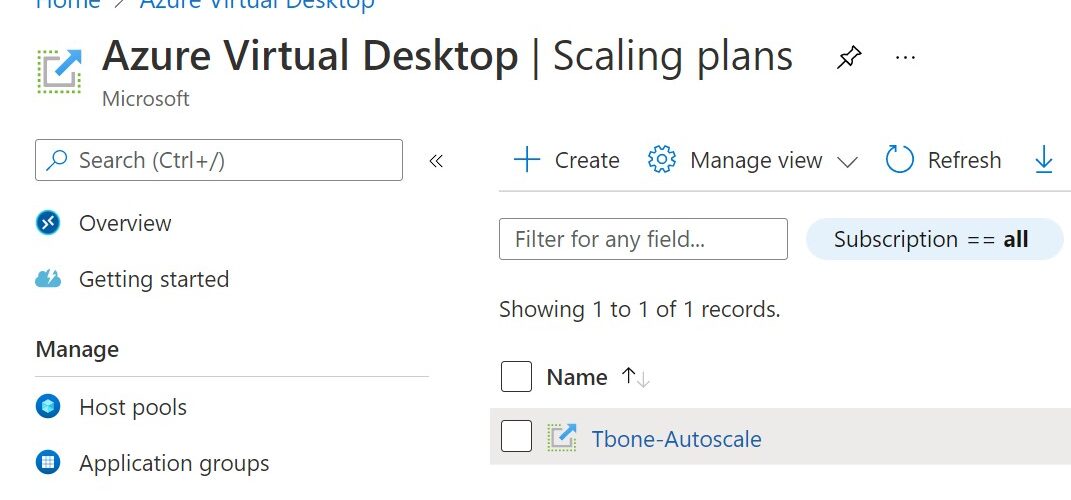
- Go to Azure Virtual Desktop > Scaling Plans, then select Create.
- In the Basics tab, Select the subscription and resourcegroup.
- Enter a Name for the scaling plan.
- Select Region and set the Time zone. (the timezone is used for the schedule)
- In Exclusion tags, you have the possibility to exclude VMs you don’t want to scale
- Select Next, which should take you to the Schedules tab.
- In the Schedules tab, select Add schedule.
The Schedule
Now you are in the middle of the setup and this is where the magic happens!
- Enter a name for your schedule into the Schedule name field.
- In the Repeat on field, select which days your schedule will repeat on.
You can only create one schedule for each day. So If you include Mondays in this schedule, you cannot use Monday in another schedule later on.
- In the Ramp up tab, enter your desired values:
Start time, The time to start ramping up and preparing VMs for peak business hours.
Load balancing algorithm, The Load Balancing to use during Ramp Up. Recommend breadth-first algorithm that will distribute users across existing VMs to keep access times fast.
Minimum percentage of hosts, enter the percentage of session hosts you always want to remain on during Ramp Up.
Capacity threshold, enter the percentage of available host pool capacity that will trigger a scaling action. For example, if 2 session hosts in the host pool with a max session limit of 20 are turned on, the available host pool capacity is 40. If you set the capacity threshold to 75% and the session hosts have more than 30 user sessions, the autoscale feature will turn on a third session host. This will then change the available host pool capacity from 40 to 60.
- In the Peak hours tab, enter your desired values:
Start time, The start time for when your usage rate is highest during the day (Peek Hours). This time is also the end time for the ramp-up phase.
Load balancing, The Load Balancing to use during Peek Hours. Recommended Depth-first load balancing to distribute new sessions to any available session host and fill each host to max
Capacity threshold, Cannot be configured, the same as for Ramp Up is used.
- In the Ramp Down tab, enter your desired values:’
Start time, The start time for when you want to Ramp Down. This time is also the end time for the Peak Hour phase.
Load balancing, The Load Balancing to use during Ramp Down. Recommended Depth-first load balancing to distribute new sessions to any available session host and fill each host to max
Minimum percentage of hosts, enter the percentage for how many hosts to preserve after Ramp Down.
Capacity threshold, enter the percentage of available host pool capacity that will trigger a scaling action. (There can be situations wher we still need to scale up)
Force logoff users This is used to really be able to Ramp Down. Use with care!
You can also configure a delay before force logoff with a custom message to the users.
- In the Off-Peek Hours tab, enter your desired values:’
Start time, The start time for your Off-Peak Hour. This time is also the end time for the Ramp Down phase.
Load balancing, The Load Balancing to use during Off-Peak Hour. Recommended Depth-first load balancing to distribute new sessions to any available session host and fill each host to max
Capacity threshold, Cannot be configured, the same as for Ramp Down is used.
- Assign the scaling plan to your host pool
Conclusion
After activating this at a customer, we could immediately see the effects of scaling up and down machines during the day. The cost savings were quite good, just out of the box.
There were some things I missed though:
The scaling schedule is not able to shutdown the complete hostpool. But you can use the VM feature to shutdown at a schedule to achieve this.
If the above is used, you also must enable the autostart at fist connection for the host pool. Thias is also missing in the autoscaling feature.
The possibility to logoff users is quite brutal. It is better tu use the session limit in RDP settings. To sign off users that has been idle for a specific time.
You cannot get it all in a preview. hope it will be better when released!
But if you really want to optimize your cost for AVD, take a look at Nerdio! It´s a small license cost, but it will really pay off!


