Country based Intune Scope Tags with PowerShell or Azure Automation
I´m currently working with a multinational company and their device management with Intune. They use delegated administration in Intune based on Scope Tags. In this blog, we’ll explore why scope tags are important, especially when using delegated administration, how to create them, how to assign them to devices, and the results you can expect after assignment. But not only that, I also have a script to update scope tag based on the country of the primary user.
Why Scope Tags are Important in Delegated Administration
Scope tags in Intune are essential for managing access and visibility within an organization. They allow administrators to delegate control over specific devices, policies, and profiles to different IT teams or regional administrators. This ensures that each admin only has access to the resources they need, enhancing security and reducing the risk of unauthorized changes.
For example, if you have a regional office in Seattle, you can create a scope tag called “Seattle” and assign it to the devices and policies relevant to that office. This way, only the Seattle IT admins can manage those resources, ensuring a clear separation of duties..
How to Create Scope Tags
Creating scope tags in Intune is a straightforward process. Here’s how you can do it:
- Access the Intune Admin Center:
Start by logging into the Microsoft Intune admin center. Navigate to Tenant administration. - Navigate to Roles and then Scope Tags
- Click +Create, to create a new Scope Tag
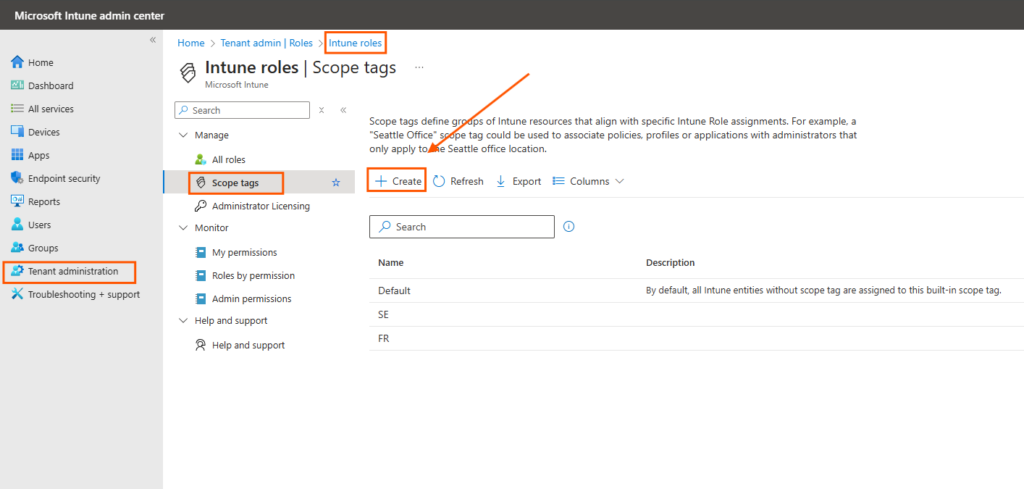
- Provide a Name and an optional Description for the scope tag.
- Optionally: Assign the Scope Tag: On the Assignments page, choose the groups containing the devices you want to assign this scope tag to.
- Click Next and then Create.
How to Assign Scope Tags to Devices
Assigning scope tags to devices can be done in a few simple steps:
- Access the Intune Admin Center:
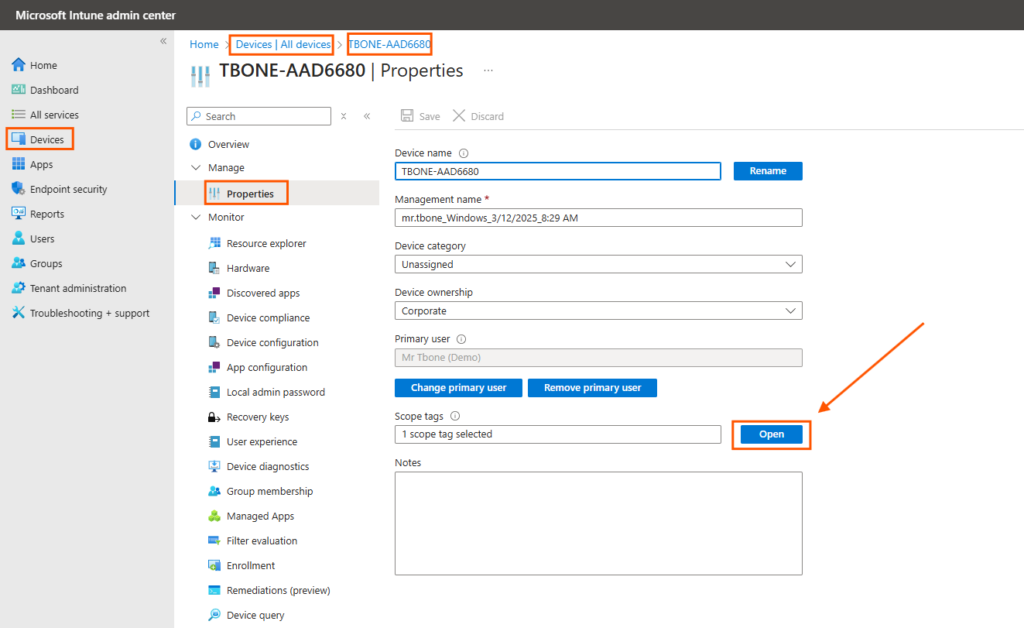
Start by logging into the Microsoft Intune admin center. Navigate to Devices and All Devices - Select the Devices you want to tag
- Navigate to Properties for this device
- Click Open next to the Scope Tags information
- Choose the scope tags you want to assign to the devices and save your changes.
How Scope Tags Can Be Scoped in Custom Admin Roles
Custom admin roles in Intune allow for more granular control over administrative permissions. Scope tags play a crucial role in defining what each custom admin role can access and manage. Here’s how you can scope scope tags in custom admin roles:
- Access the Intune Admin Center:
Start by logging into the Microsoft Intune admin center. Navigate to Tenant administration. - Navigate to Roles
- Click +Create to create a new Intune Role
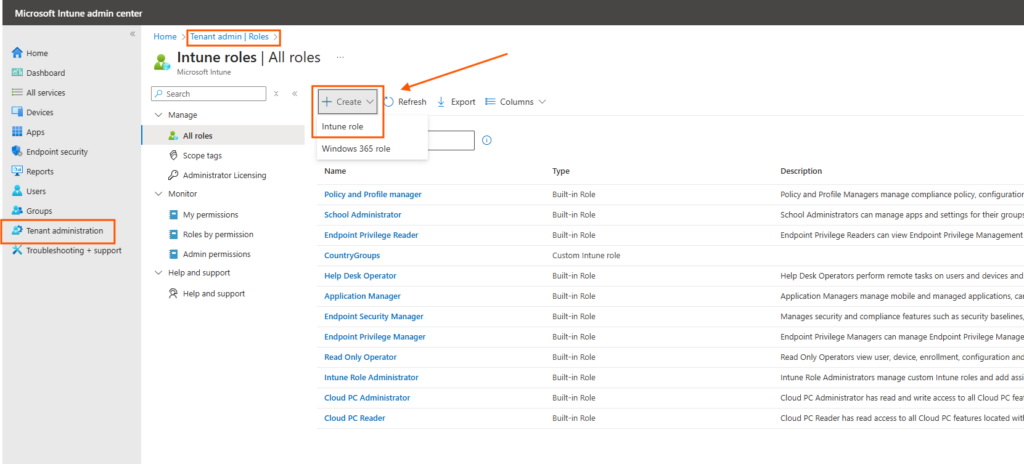
- Provide a Name and an optional Description for the Custom Role
- Assign Permissions: On the Permissions page, choose the permissions you want to assign to this role
- Scope Tags Assignment: On the Scope (Tags) page, select the tags that you want to assign to this role. This ensures that the admin role can only manage objects tagged with these scope tags
- Review and create the Role
For example, you can create a custom admin role called “EU-Intune admin” and assign scope tags like SE, PL, FR, and DE. This role will then have administrative rights over all objects tagged with these scope tags
Effects and Benefits of Using Scope Tags and Scoped Custom Admin Roles
Using scope tags and scoped custom admin roles in Intune has several significant effects and benefits:
- Enhanced Security: By limiting access to specific devices and policies, scope tags ensure that only authorized admins can manage these resources. This reduces the risk of unauthorized changes and enhances overall security.
- Improved Efficiency: Scoped custom admin roles allow IT teams to focus on their designated areas without interference from other teams. This leads to more efficient and organized management.
- Clear Visibility: Admins can easily identify and manage devices based on their assigned scope tags, making it easier to apply policies and troubleshoot issues.
- Streamlined Administration: Scope tags and custom admin roles help streamline the administration process by ensuring that each admin has the right level of access and visibility to manage their resources effectively.
The Script
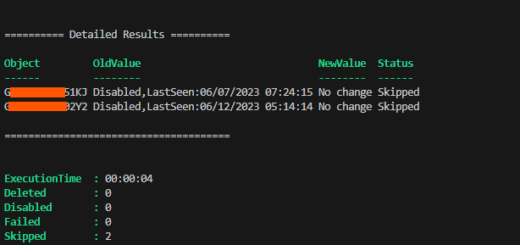
I experienced a problem in the current organization. Only the users were clearly marked with the country in witch they were employed. The devices had no identifier that could help me assig the correct scope tag. But every device has a primary owner, so why not use that!
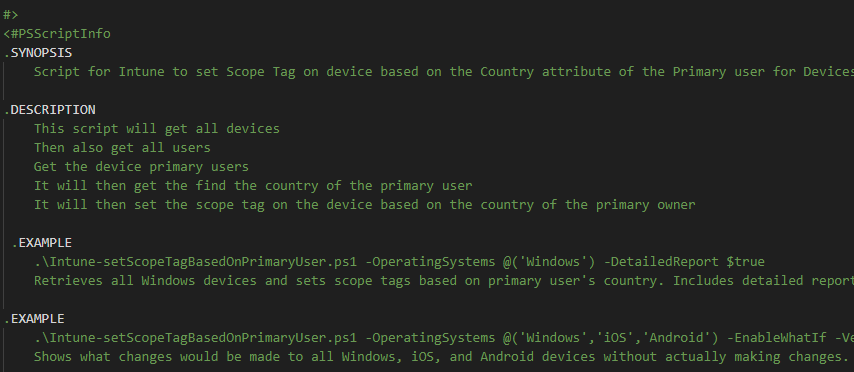
I started to use my old script that set the primary user of all devices in the organization, made some new functions and now I have a new script that can update the scope tag based on the primary user country attribute. This can be executed manually or scheduled in Azure Automate. You can find it on my Github here.
Conclusion
Intune scope tags are a powerful tool for any organization looking to streamline its device management and enhance security through delegated administration. By understanding how to create and assign scope tags, and how to scope them in custom admin roles, you can ensure that your IT teams have the right level of access and visibility to manage their resources effectively. But sometimes you need additional automations to be sure the scope tags is correct and updated.