Windows protected print mode: A secure print solution
What is Windows Protected Print Mode?
Windows Protected Print Mode is a feature introduced in Windows 11 that aims to enhance the security of your printing environment. It uses the modern print stack and works exclusively with Mopria-certified printers. By eliminating the need for third-party drivers, it simplifies the printing process and reduces the attack surface for potential threats.
How Does It Work?
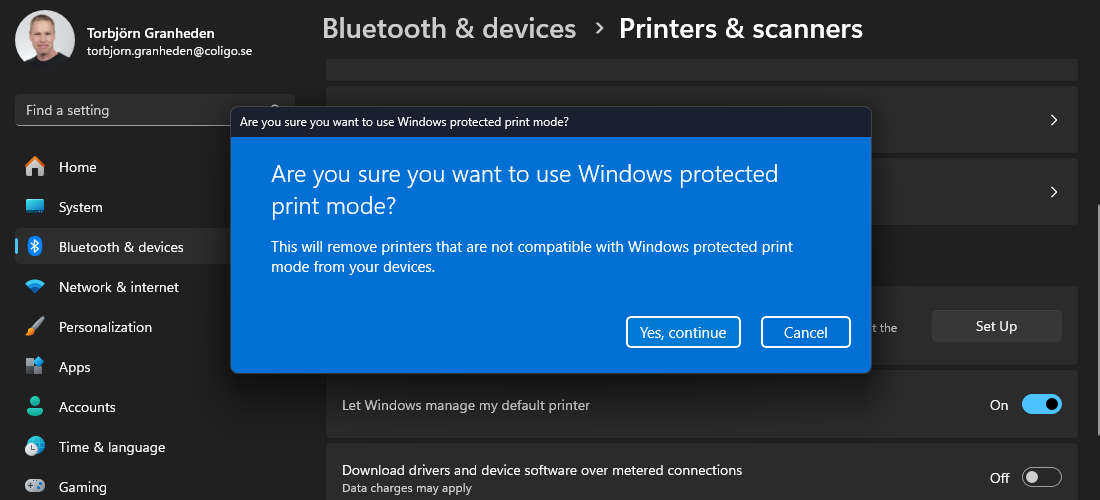
When you enable Windows Protected Print Mode, any printers using third-party drivers are automatically uninstalled. The system then uses the modern print stack, which operates with lower privileges, reducing the risk of vulnerabilities. This means that even if a malicious actor tries to exploit your printer, they won’t have the same level of access they would with traditional drivers.
Protection Against Print Nightmare
Remember the Print Nightmare vulnerability that left Windows systems exposed to malware gaining full system privileges? Windows Protected Print Mode addresses this issue head-on. By removing third-party drivers and using a more secure print stack, it significantly reduces the risk of such vulnerabilities.
Defending Against Stuxnet
Stuxnet, the infamous malware that targeted industrial control systems, exploited vulnerabilities in printer drivers. Windows Protected Print Mode mitigates this risk by eliminating the need for these drivers altogether. This means that even sophisticated malware like Stuxnet would have a much harder time finding a foothold in your system.
Why You Should Enable It
Enabling Windows Protected Print Mode not only enhances your security but also provides a consistent and simplified printing experience. It’s a win-win for both IT administrators and end-users. Plus, with most new printers being Mopria-certified, compatibility isn’t a major issue.
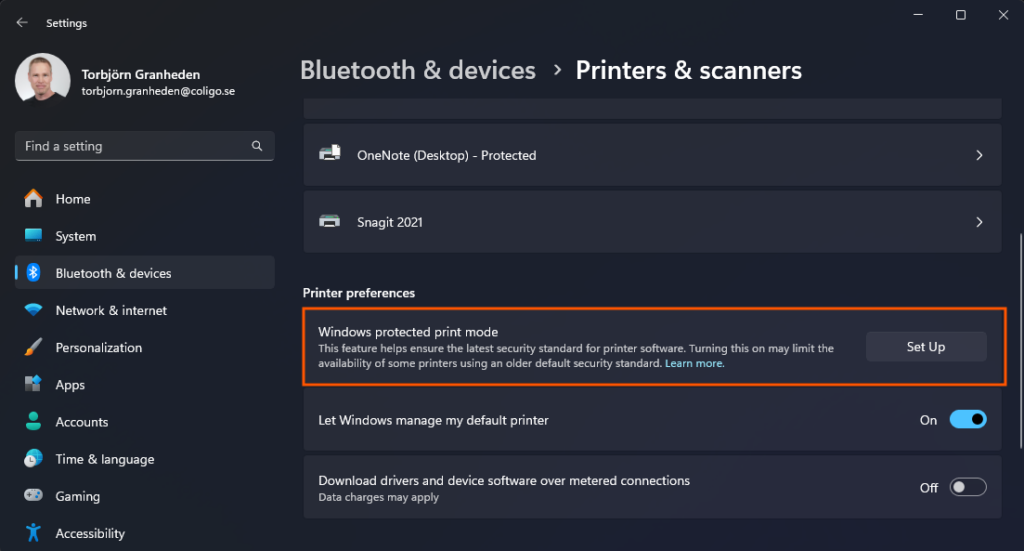
How to Enable Windows Protected Print Mode
In GPO, we have the setting Configure Windows protected print. But we can still not find the setting in Settings Catalog. I hope it will appear this year! So to configure this we need to add a custom configuration with a OMA-URI.
- Access the Intune Admin Center:
Start by logging into the Microsoft Intune admin center. Navigate to Devices > Windows > Configuration - Click Create and select + New Policy
- Select to create a policy for Windows 10 and later from Templates (Not Settings Catalog)
- Select the template Custom
- Give the configuration a suitable name and description and select Next
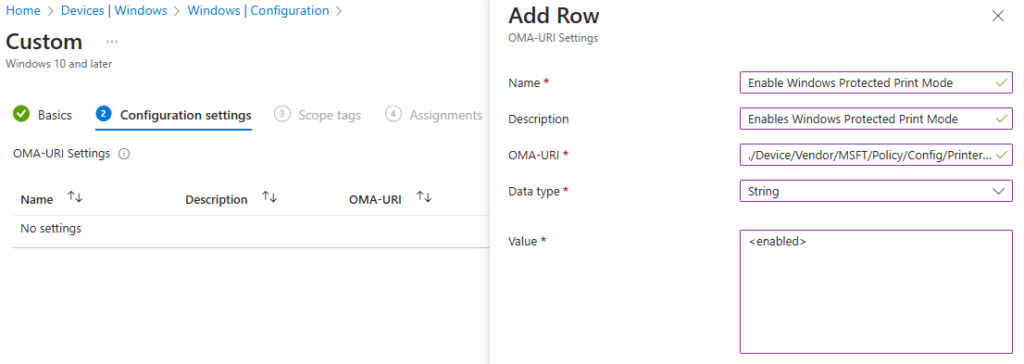
- On the Configuration settings page, Add the folowing settings:
- Name: Enable Windows Protected Print Mode
- Description: Enables Windows Protected Print Mode
- OMA-URI: ./Device/Vendor/MSFT/Policy/Config/Printers/ConfigureWindowsProtectedPrint
- Data type: String
- Value: <enabled>
- Click Next
- Add suitable Scope tags and click Next
- Assign the configuration to a test group and finish the creation of the config
And that’s it! You can now enjoying a more secure printing environment.