The New Way of Connecting Microsoft Intune with Managed Google Play
Introduction
In the ever-evolving landscape of mobile device management, staying updated with the latest integration methods is crucial. Recently, Google has simplified the process of connecting Microsoft Intune with Managed Google Play, making it easier than ever to manage Android devices within your organization. In this post, we’ll walk you through the new and streamlined process, ensuring you can leverage these improvements to enhance your device management strategy.
Why This Matters
Connecting Microsoft Intune with Managed Google Play is essential for organizations using Android Enterprise. This integration allows for seamless app deployment, policy enforcement, and overall better management of Android devices. With the new changes, the process has become more intuitive, reducing the complexity and time required to set up.
What’s new
Google has made it easier to sign up for Android Enterprise and access Google services. Previously, a personal Gmail account was necessary for Android Enterprise registration. However, this has changed. Now, you can use a corporate email address to create an account. This enhancement provides a seamless experience with single sign-on (SSO) capabilities. This account can then be used to integrate various Google services, beginning with the free Android Enterprise service, which is essential for connecting with Microsoft Intune.
Step-by-Step Guide
- Access the Intune Admin Center:
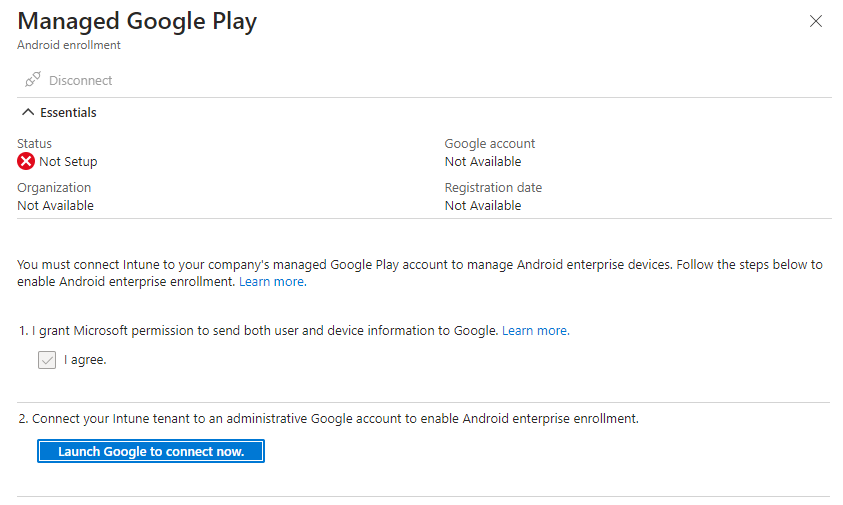
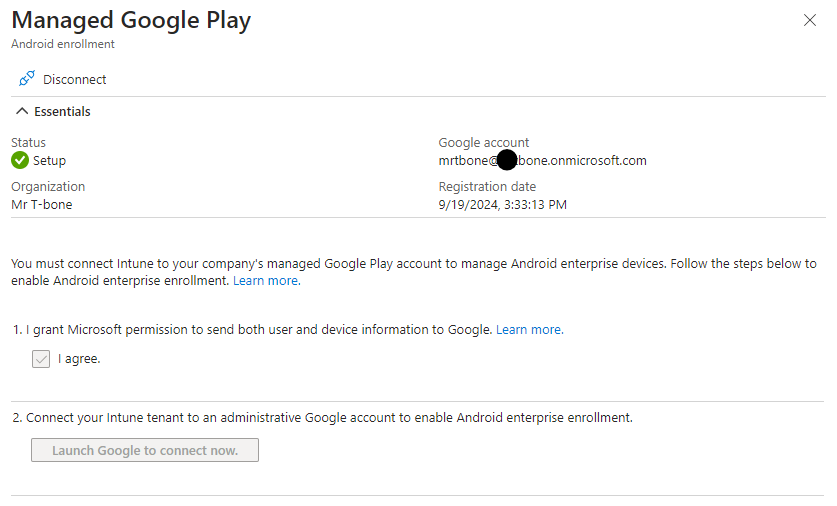
Start by logging into the Microsoft Intune admin center. Navigate to Devices > Android > Enrollment > Managed Google Play.
- Launch the Connection Wizard:
On the Managed Google Play blade, check the box I agree to the terms and click Launch Google to connect now.
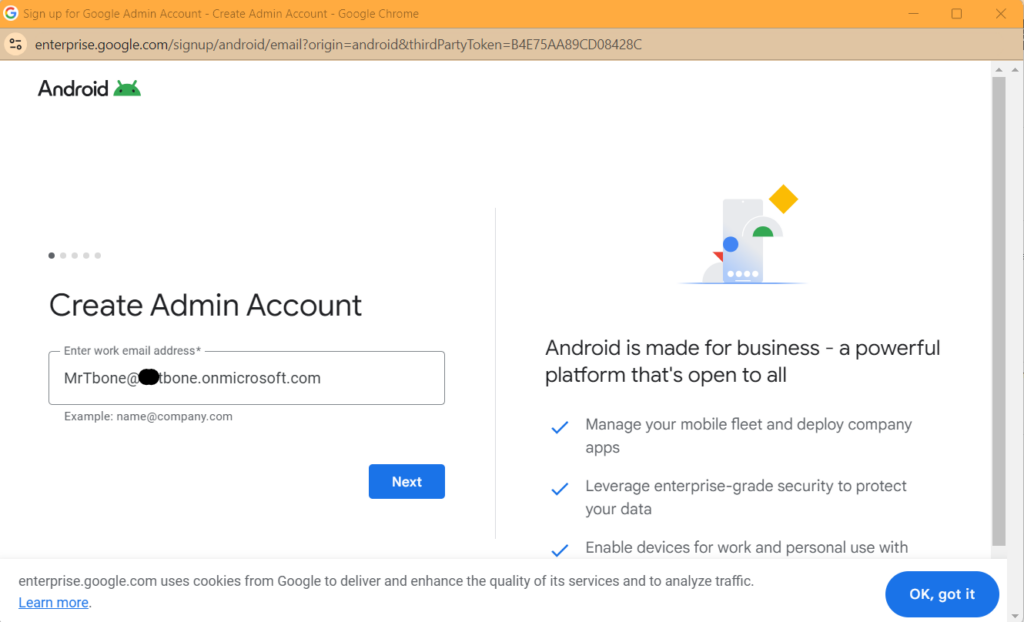
- Create an Admin Account:
You’ll be prompted to create an admin account. Use a corporate email address for this step. This change eliminates the need for a personal Gmail account, streamlining the process significantly.
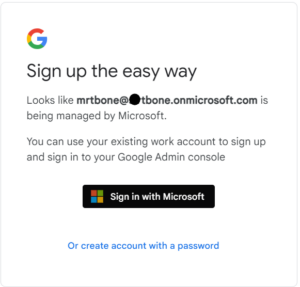
- Sign up the easy way:
Now you can select to sign in with Microsoft
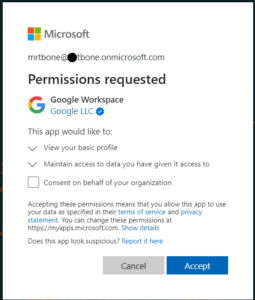
- Permissions requested:
You now need to Accept Google Workspace to access your basic profile and maintain that access.
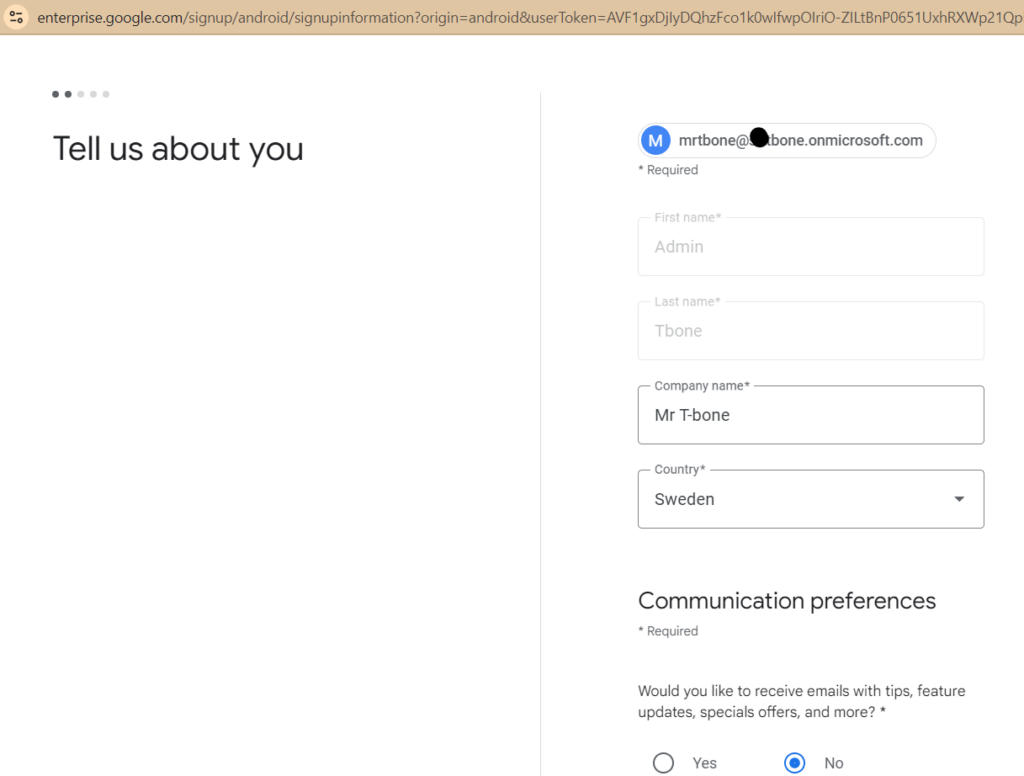
- Tell us about your self:
Enter the requested information
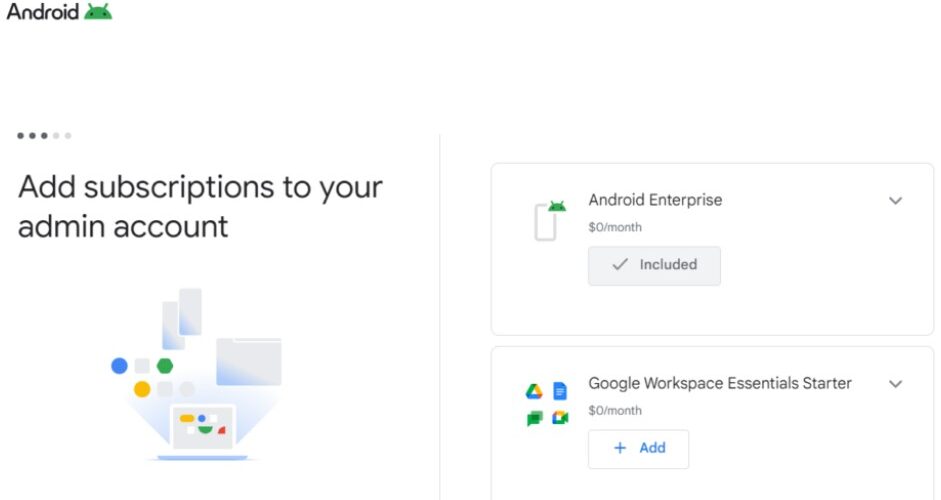
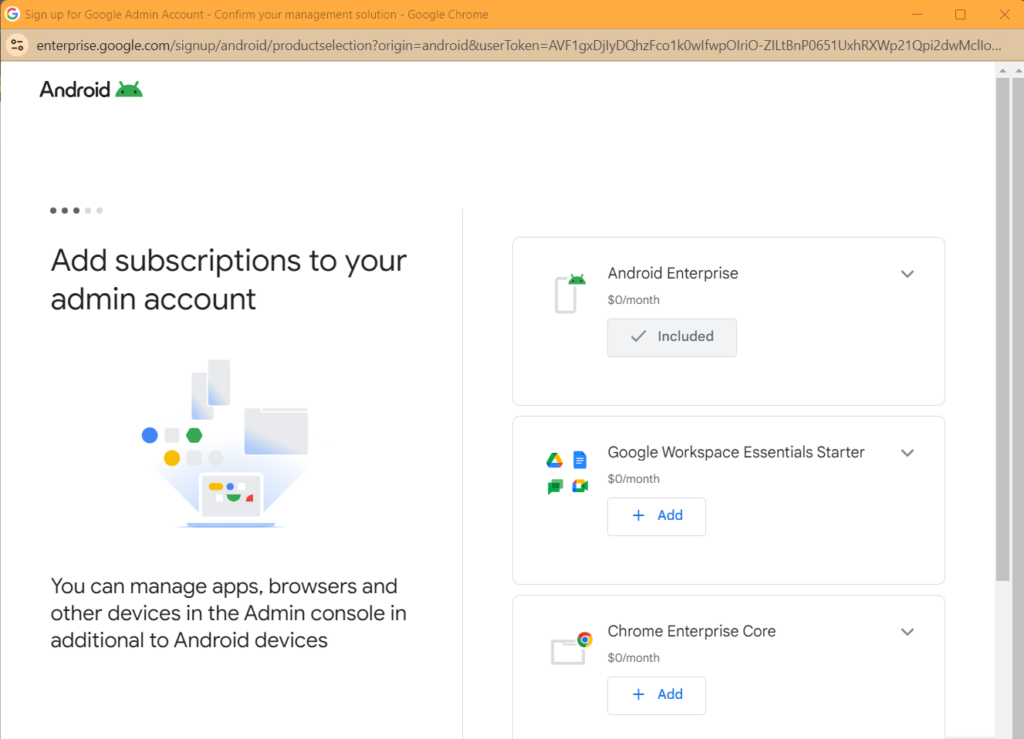
- Add subscriptions to your admin account:
Here you can select what services and subscriptions you would like to add. Select Android Enterprise
Note that you also can add Google workspace and other services.
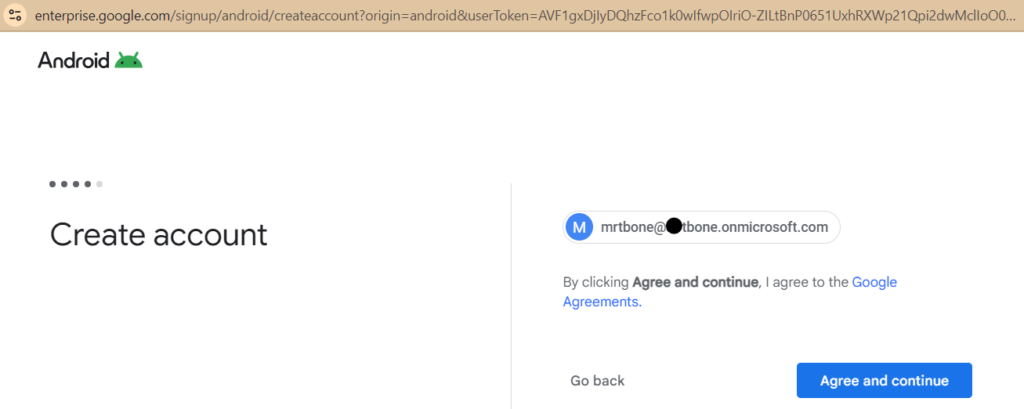
- Create account:
Lets go ahead and create the account by selecting agree and continue
- Manage your Android Enterprise devices using Microsoft Intune:
Finally you agree to allow and create account to connect Microsoft Intune
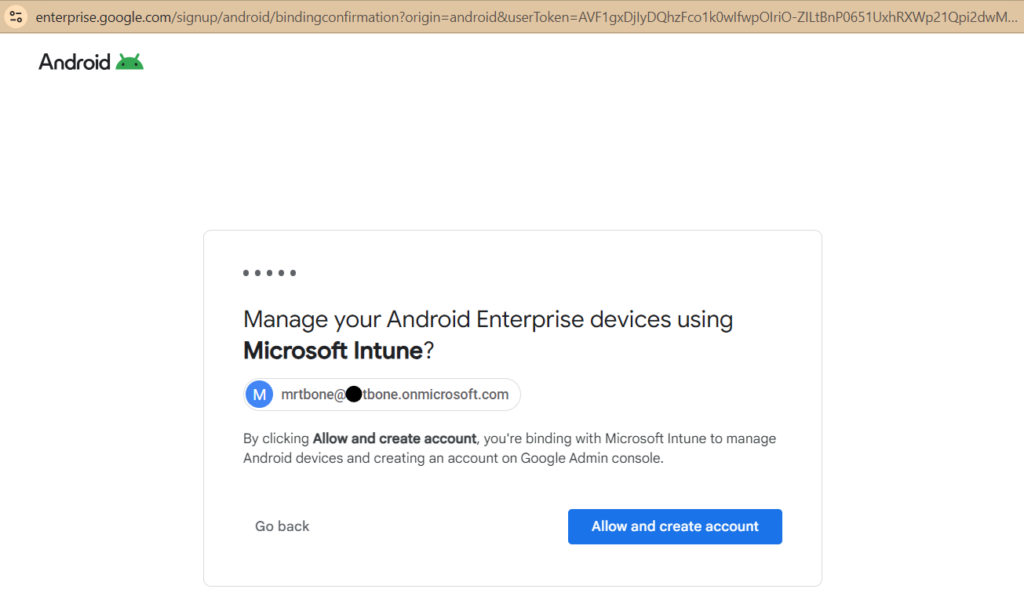
Now you are redirected back to Microsoft Intune and your connection should show a green marker
Benefits of the New Process
- Simplified Account Creation: No need for a personal Gmail account; use your corporate email.
- Single Sign-On (SSO): Enhanced security and ease of access with SSO.
- Streamlined Workflow: The entire process can be completed within the Intune admin center, reducing the need for multiple logins and steps.
Heads up!
It is not currently possible to migrate or change the Managed Google Play Account if you already have it configured. To remove the existing account you need to unenroll all Android Enterprise devices. We will maybe see a migration path in the future.
Conclusion
The new method of connecting Microsoft Intune with Managed Google Play is a game-changer for IT administrators. By simplifying the account creation and connection process, Google and Microsoft have made it easier to manage Android devices efficiently. Make sure to take advantage of these updates to optimize your mobile device management strategy.