Introduction to Microsoft Cloud PKI
In the digital age, the security of online transactions and communications is paramount. Public Key Infrastructure (PKI) has long been the cornerstone of digital security, ensuring the authenticity and integrity of data exchanged across the vast expanse of the internet. However, traditional PKI solutions have often been shackled by the complexities of on-premises infrastructure, requiring a significant investment in both time and resources to manage effectively.
Microsoft Cloud PKI starts a new era of certificate management, one that is cloud-native and seamlessly integrated with your endpoint management solutions. This innovative service is not just about simplifying certificate management; it’s about transforming to cloud and implement a strategic asset for your organization.
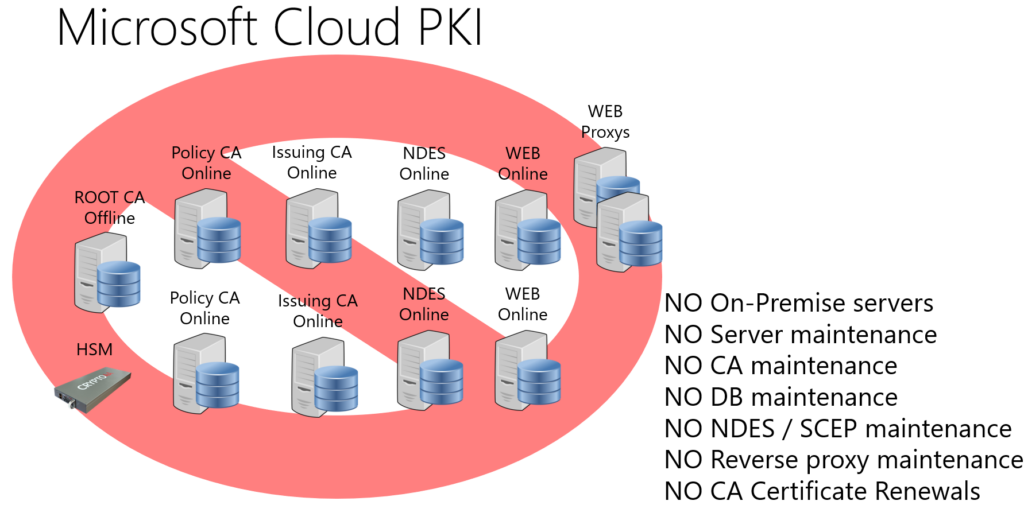
Imagine a world where we don´t need to implement and manage on-premises CA root-, CA Issuing- SCEP-, Web-, Proxy-servers. Imagine also a world where setting up a PKI infrastructure is measured in minutes, not weeks. Where the burdensome tasks of planning, deployment, and maintenance are replaced by a few clicks in a user-friendly interface. Microsoft Cloud PKI is that world realized, offering a streamlined, automated approach to certificate lifecycle management that is both agile and cost efficient.
As we explore the capabilities and advantages of Microsoft Cloud PKI, we must keep in mind our primary goal: To enhance the security and productivity of your devices and users. With Microsoft Cloud PKI, you’re not just adopting a service, you’re embracing a future where digital security is intuitive, robust, and effortlessly aligned with your business objectives.
Microsoft Cloud PKI, a sophisticated feature of the Microsoft Intune suite, offers a robust framework for digital certificate management. For organizations with specific security requirements, Microsoft Cloud PKI is also accessible as an add-on license. This dual offering ensures that whether integrated within the broader Intune suite or utilized as a specialized service, Microsoft Cloud PKI adapts to the unique demands of your security landscape.
Key Features of Microsoft Cloud PKI
Microsoft Cloud PKI simplifies the complex process of managing certificates in many ways. the main goal for it´s first release is to:
Deploy Certificates to Intune Clients
But we have some more feature to mention:
- Cloud PKI Setup in minutes Used to take weeks
- Private PKI It is not trusted by anyone by default
- 2 tier solution One Root and One to many Issuing CA´s
- SCEP To use in Intune to deploy certificates to users and devices
- BYOCA Bring Your Own Certificate Authority as a Root for Microsoft Cloud PKI Issuing CA
- Automate the entire lifecycle of certificates, from issuance to renewal and revocation.
- Create multiple certification authorities to cater to different organizational needs.
- Manage certificates for Intune-managed devices across various platforms, including Windows, iOS, macOS, and Android.
Setting Up Microsoft Cloud PKI
Establishing a two-tier hierarchy begins with the establishment of the Root Certificate Authority. Organizations have the option to either establish a new root CA within Cloud PKI or opt for the “Bring Your Own Certificate Authority” (BYOCA) approach. BYOCA allows for the integration of any pre-existing PKI infrastructure from an organization’s on-premises environment. The process of setting up a Root CA within Cloud PKI is soo easy and quick.
Heads up! Right now you cannot delete a CA after setup. so be careful when testing this out!
Setup Root CA
Setting up Microsoft Cloud PKI Root CA is easy and quick:
- Open Intune Portal
- Open Tenant Administration
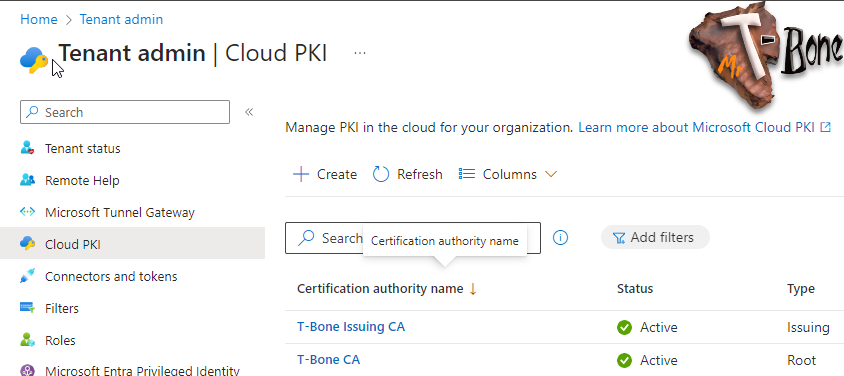
- Select Cloud PKI
- Click + Create
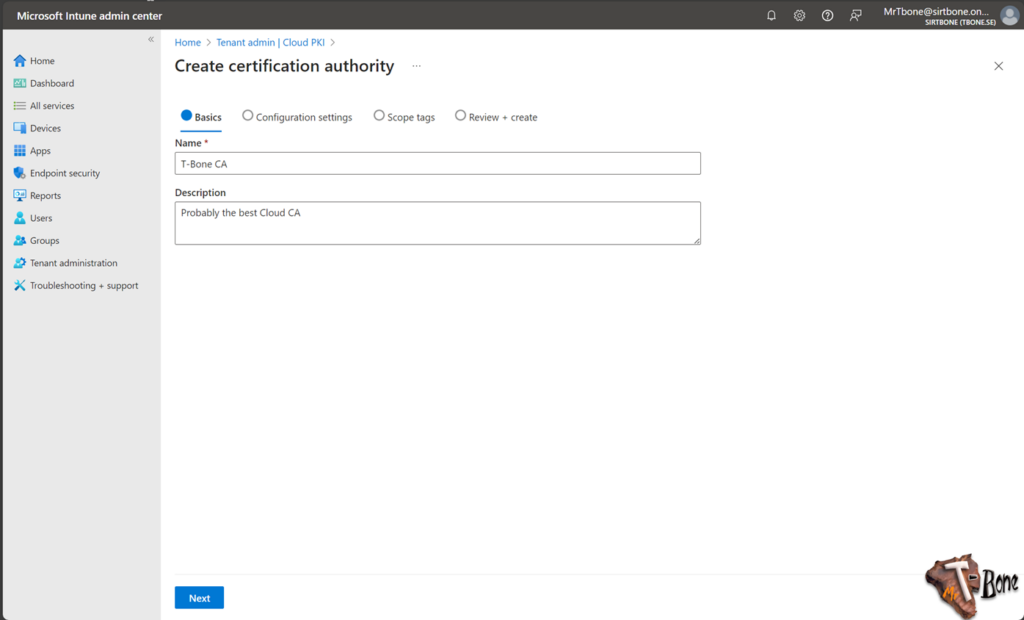
- Give the Cloud Root CA a suitable Name (This name is for the object in Intune, not the CA hierarchy name) and click Next
- Configure the Root CA with:
CA Type = Root CA
Validity Period = 10 years
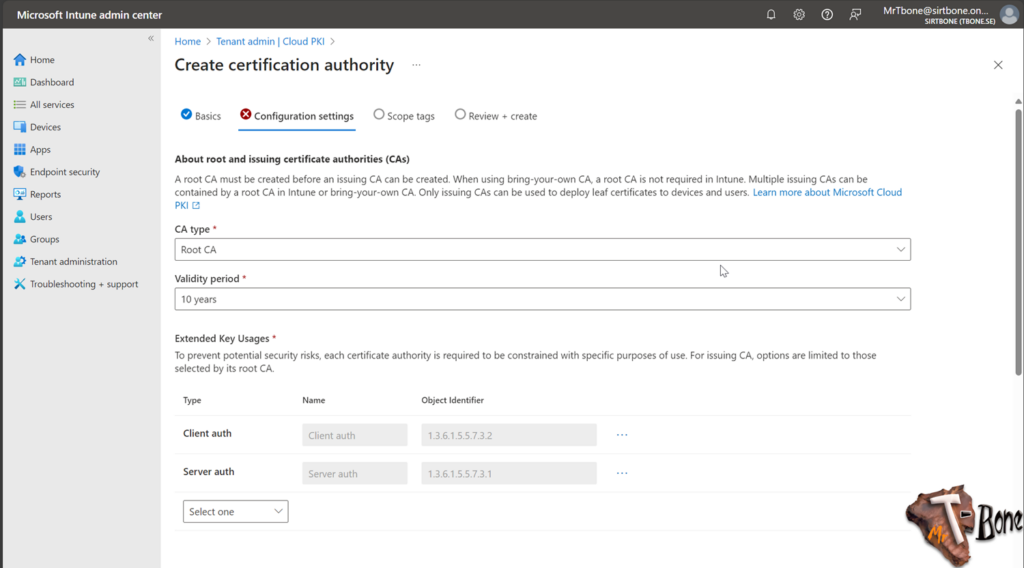
- Now you also need to add EKU (Enhanced Key Usage), select them carefully
Note that “Any Purpose” (OID 2.5.29.37.0) and “Any App Policy” (OID 1.3.6.1.4.1.311.10.12.1) is not allowed.
You need to specify all individual EKU you need for this CA.
Note also that this cannot be changed, a new CA needs to be setup if requirements for ECU change - Next you add appropriate Subject attributes
Make sure to use 2 characters in Country (C). Some 3part services require this. - Finally select the key size and algorithm
I suggest the largest one, this cannot be changed after deployment. But you can deploy 2048 keys with a CA server that has a 4096 key size.
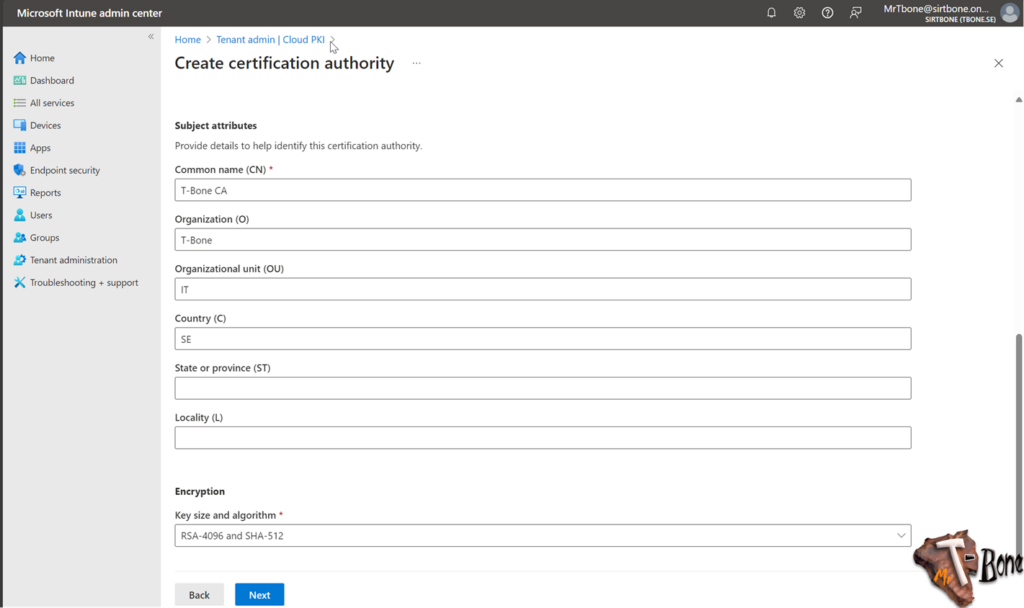
- When clicking Next, you can add scope tags and review the settings before creating the Root CA.
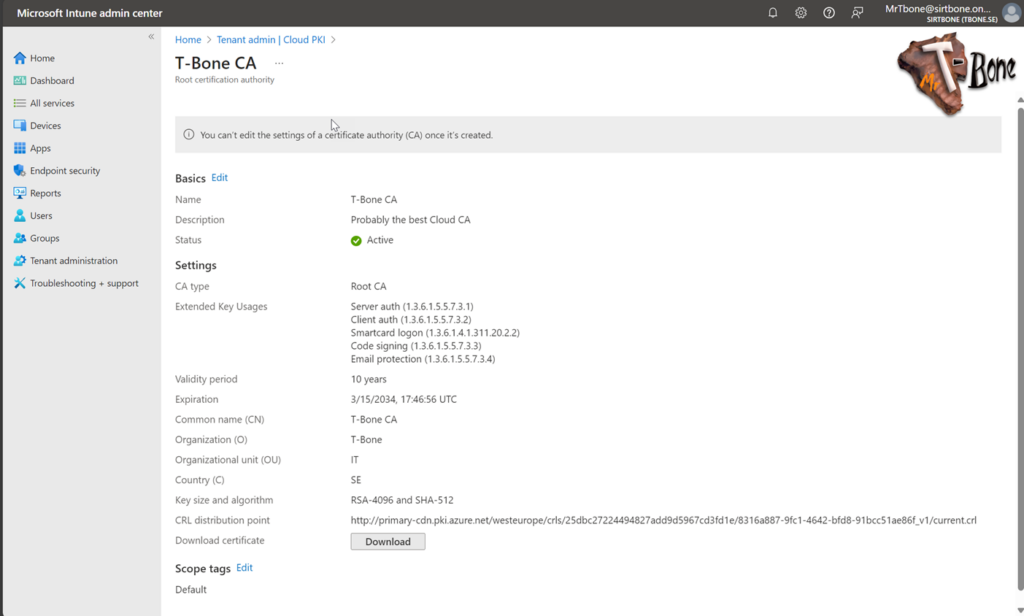
That’s it, not many minutes spent there!
Setup Issuing CA
Setting up Microsoft Cloud PKI Issuing CA is also easy and quick:
- Open Intune Portal
- Open Tenant Administration
- Select Cloud PKI
- Click + Create
- Give the Cloud Issuing CA a suitable Name (This name is for the object in Intune, not the CA hierarchy name) and click Next
- Configure the Issuing CA with:
CA Type = Issuing CA
Root CA Source = Intune
Root CA = The root previously created
Validity Period = 6 years
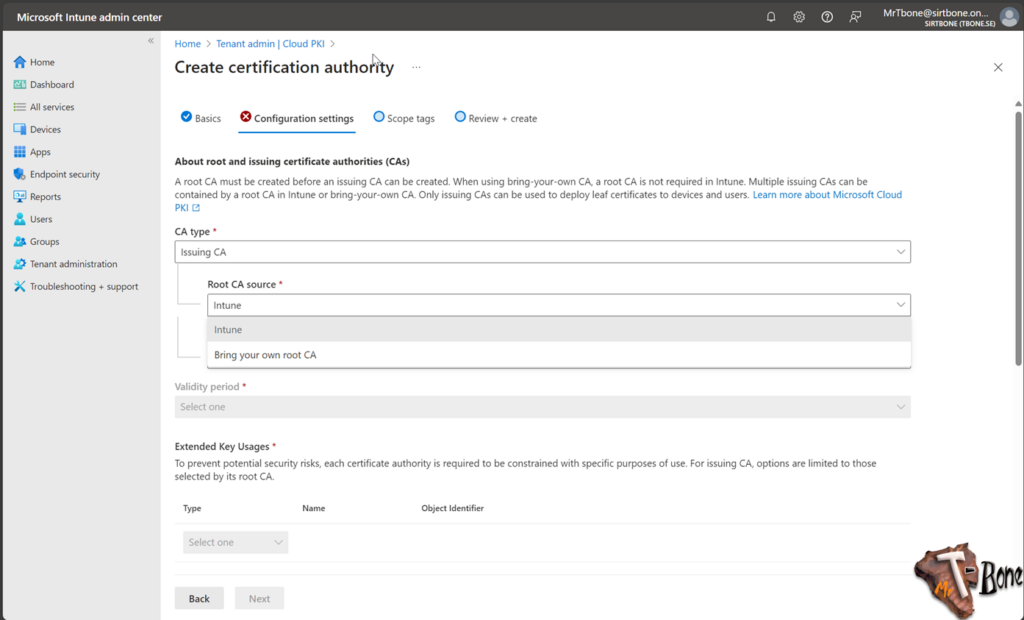
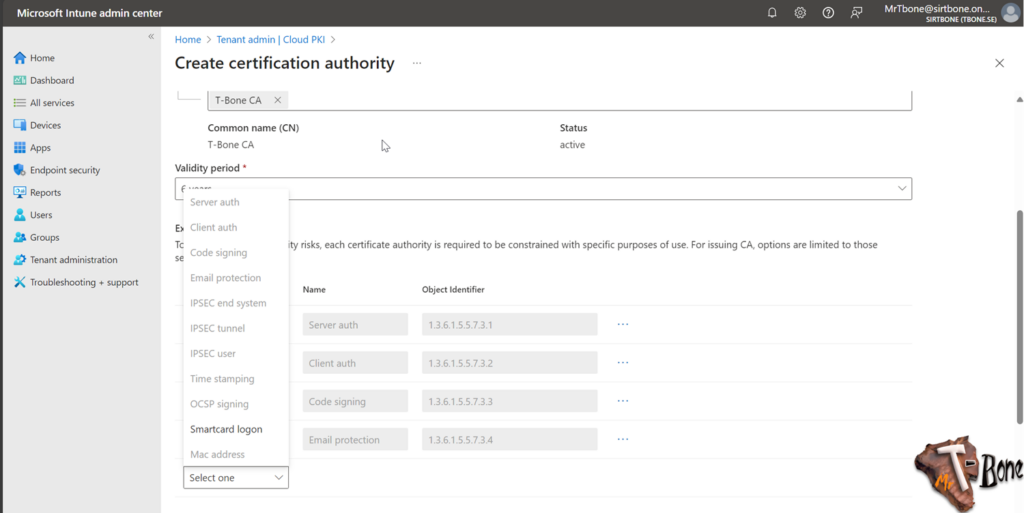
- You now also need to add the ECU you need on the Issuing CA, as you will notice, you can only add those that exist on the Root CA
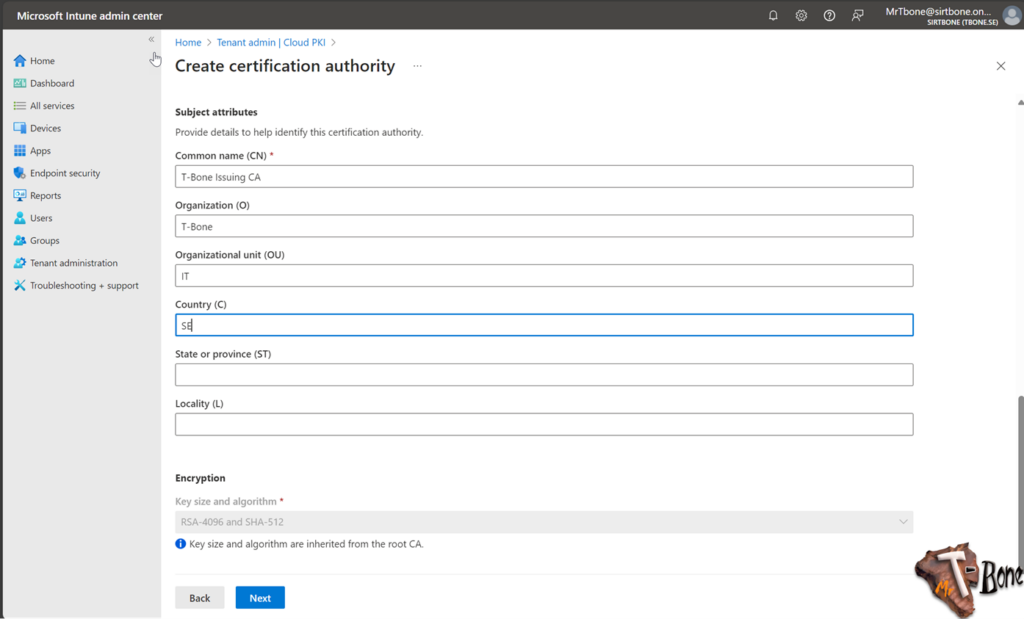
- Next you add appropriate Subject attributes
Make sure to use 2 characters in Country (C). Some 3part services require this. - Finally select the key size and algorithm
I suggest the largest one, this cannot be changed after deployment. But you can deploy 2048 keys with a CA server that has a 4096 key size.
- When clicking Next, you can add scope tags and review the settings before creating the Root CA.
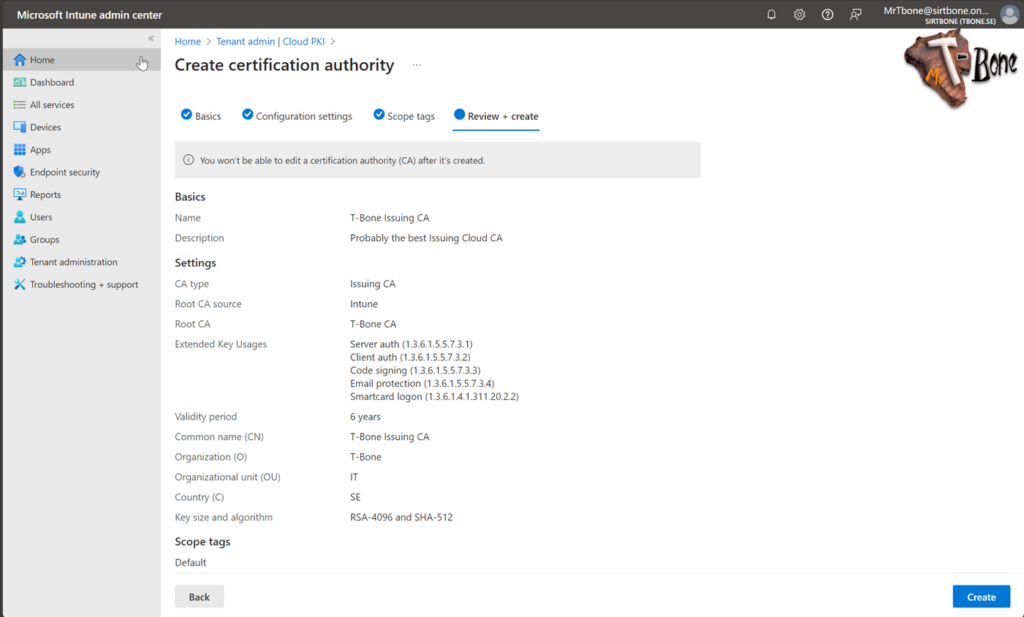
Now you are up and running with both Root CA and Issuing CA, within minutes!
Issue Certificates
To Issue certificates to Users and/or devices we first need all devices to trust the CA hirarchy. It´s Private CA, so no one trust it by default. To do this we need to get the Root certificate from the Root and deploy to our Intune Clients.
Get the Root Certificate
- Open Intune Portal
- Open Tenant Administration
- Select Cloud PKI
- Select the Root CA
- Click Download
This will download the root certificate
Deploy the Root certificate
- Open Intune Portal
- Open Devices
- Select Configuration
- Click + Create and New Policy
- Create a profile for Windows 10 or later with Profile Type Templates
- Select the Template Trusted certificate
- Give the profile a suitable Name and Description
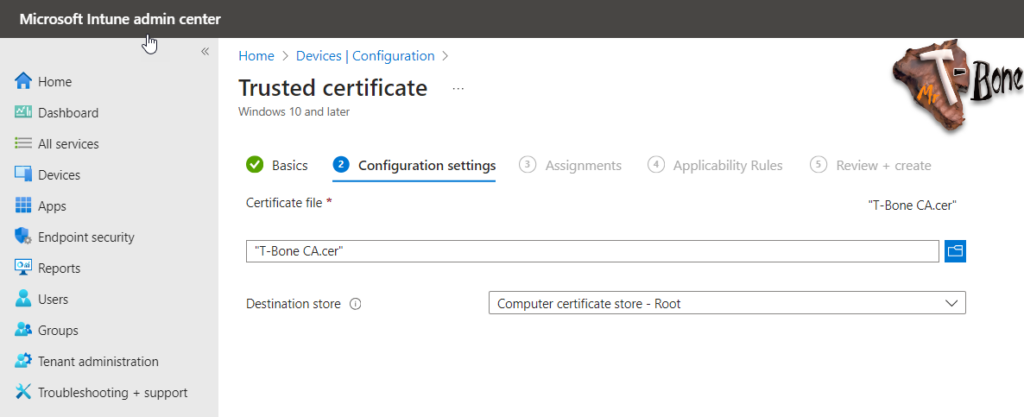
- Select the Root Certificate downloaded before
- Select Destination store – Computer Certificate Store – Root
- Assign and deploy the profile to your devices
Note that sometimes you also need to deploy the Issuing CA certificate to the Intermediate store on clients.
Deploy device certificates
- Open Intune Portal
- Open Devices
- Select Configuration
- Click + Create and New Policy
- Create a profile for Windows 10 or later with Profile Type Templates
- Select the template SCEP certificate
- Configure the certificate to fit your needs, this is an example:

Note! You should not select key size above 2048 if you need them to be stored in TPM, 4096 is not supported.
- You also need to add the SCEP Server URL. You can find this SCEP URL in properties for your on your Issuing CA
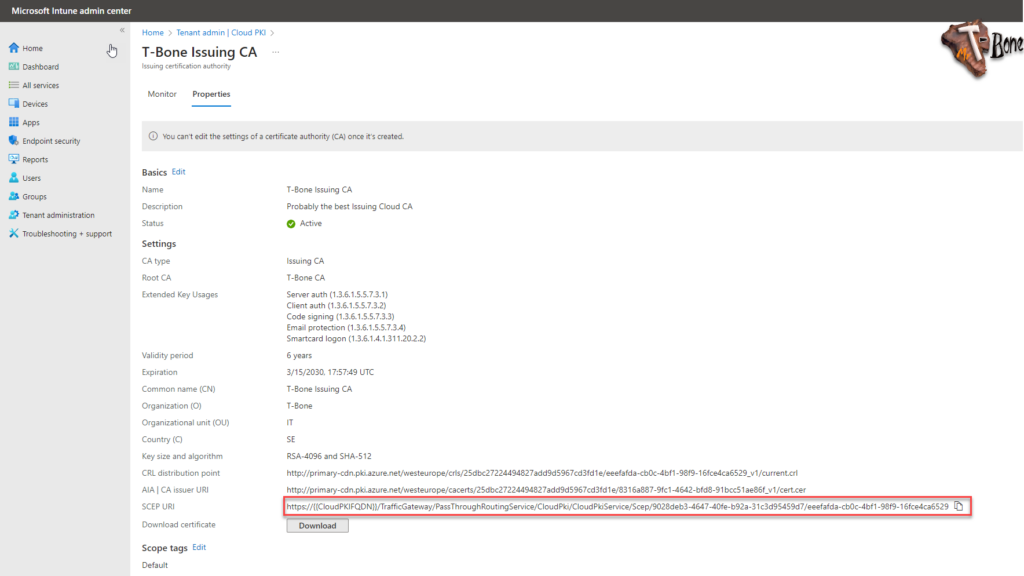

- Then assign and create your profile and it will start deploy your certificates, simple as that!
Use Cases for Microsoft Cloud PKI
Microsoft Cloud PKI can be utilized in various scenarios:
- Securing Wi-Fi networks with certificate-based authentication.
- VPN access control to ensure secure remote connections.
- Authenticating Microsoft 365 apps, providing seamless and secure user experiences.
I´m right now testing it out in different scenarios, so I will get back with more info on how we can use the Microsoft Cloud PKI
Conclusion
Microsoft Cloud PKI is so cool and simple. The CA hierarchy is setup in minutes and you are up and running with the complete PKI solution within a day. There are of course space for improvements. I´m really looking forward to the development of this service. But it works as it should already today. It Deploys Certificates to Intune Clients!

