Pilot Azure AD Connect Cloud Sync
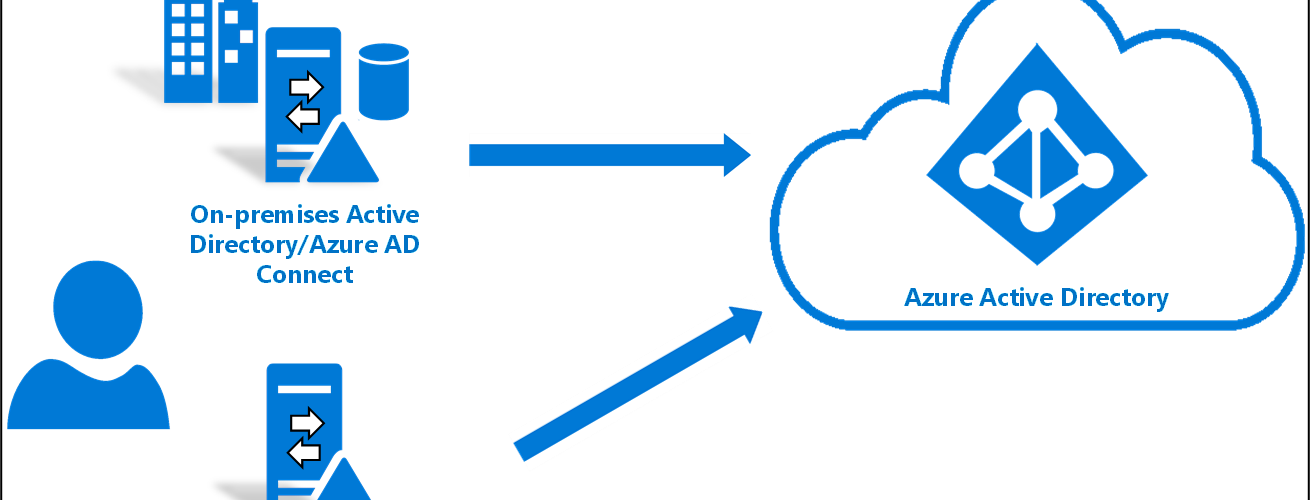
You can start using Azure AD Connect Cloud Sync in your existing environment where you already are using Azure AD Connect. This is useful if you want to pilot the new sync tool or have them side by side until all required features are ready. You can for example sync all your users and groups with Azure AD Cloud Sync but keep using Azure AD Connect for Hybrid Azure AD Join devices.
Disable Azure Ad Connect Sync Schedule
- On the server that is running Azure AD Connect sync, stop the sync by open PowerShell with Administrative Privileges and Run:
Stop-ADSyncSyncCycle
Set-ADSyncScheduler -SyncCycleEnabled $false
Filter Azure AD Connect sync to exclude specific objects
- Create custom inbound rules to filter out users, groups and computers from AD Connect
- Launch the synchronization editor
- Select Inbound from the drop-down list for Direction and select Add new rule

- On the Description page, enter the following and select Next:
- Name: Enter a custom name for your rule
- Description: Enter a custom description
- Connected System: Choose your local AD
- Connected System Object Type: User
- Metaverse Object Type: Person
- Link Type: Join
- Precedence: Enter a unique value
- Tag: Leave this empty
- On the Scoping filter page, enter the OU or security group that you want the pilot based off.

- On the Join rules page, select Next.
- On the Transformations page, add a Constant transformation: flow True to cloudNoFlow attribute. Select Add

- Do step 4-8 for Connected System Object Type/Metaverse Object Type: Computer/Device, Group/Group and Contact/Contact.

Even if Azure AD Connect Cloud Sync does not currently support computer, I would recommend creating a filter. One day support will be added and then it will break if you don´t have this filter in place.
- Now create custom outbound rules by selecting Outbound from the drop-down list for Direction and select Add new rule
- On the Description page, enter the following and select Next:
- Name: Enter a custom name for your rule
- Description: Enter a custom description
- Connected System: Choose your Azure AD
- Connected System Object Type: User
- Metaverse Object Type: Person
- Link Type: JoinNoFlow
- Precedence: Enter a unique value
- Tag: Leave this empty

- On the Scoping filter page, choose cloudNoFlow equal True. Then select Next.

- On the Join rules page, select Next.
- On the Transformations page, don not add any transforms.
- Create the rule by Add button.
- Do step 10-15 for Connected System Object Type/Metaverse Object Type: Computer/Device, Group/Group and Contact/Contact.

Even if Azure AD Connect Cloud Sync does not currently support computer, I would recommend creating a filter. One day support will be added and then it will break if you don´t have this filter in place.
Install Azure AD Connect Cloud Sync
- Open azure active directory portal https://entra.microsoft.com/
- On the dashboard, click the link Go to Azure Active Directory
- On the dashboard, click the link Go to Azure AD Connect
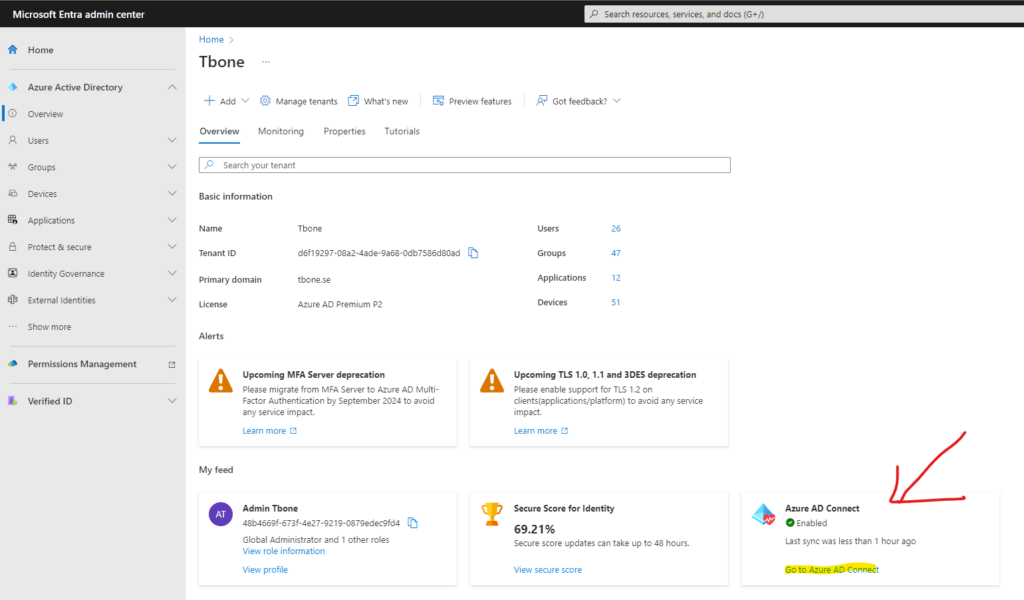
- Select the link Manage Azure AD Cloud Sync

- Select Download Agent.

- Accept the Terms & download the installer.
- Install the downloaded agent on a server dedicated to being an Azure AD Connect cloud sync server

After installation the configuration wizard automatically starts.
- Authenticate against your Azure Active Directory and Local Active Directory.
- Let the wizard create a grouped managed service account (gMSA)

- Verify that the domain is added and add additional domains in your forest if needed.

- Start configure the Azure AD Connect Cloud Sync Agent

- When the sync agent is configured and ready, it can be verified in Azure portal by selecting Review all agents

- Verify a healthy agent status. of your newly deployed agent.

Configure Azure AD Connect Cloud Sync Agent
- Select New Configuration

- Choose domain and if Password hash sync should be enabled and click Create button
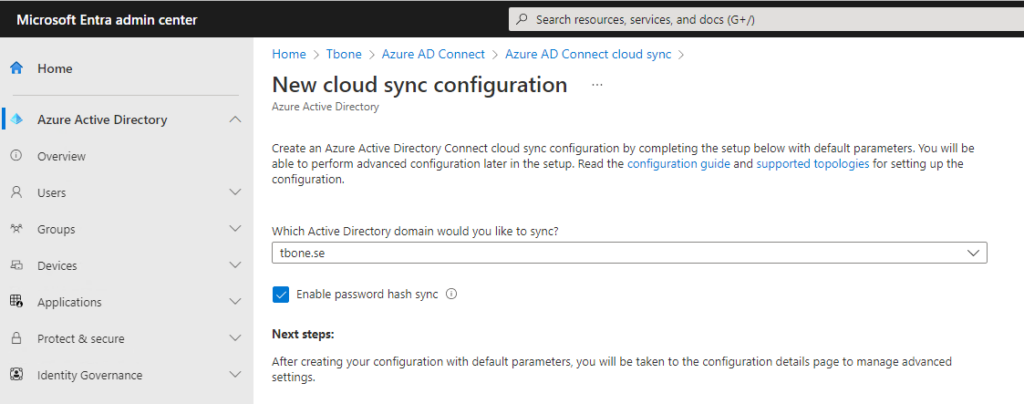
- Now you are presented with five steps to configure your agent sync.
- First step is to scope your sync. You can easy scope by using OU or group. Let´s add the OU we filtered out with rules in Azure Ad Connect.

- Second step is to once again determine password hash sync and also to edit attribute mappings

- Third step is to validate your config by provision one test user

Note that the user needs to be entered with distinguished name when testing the provisioning.

If all goes well, you should see parts marked with green

- Fourth step is to enter an email where notifications should be sent, and the limit for accidental deletions.
- In Step five it´s time to enable and then click the save button to your configuration

- After saving you can verify status and statistics of the sync
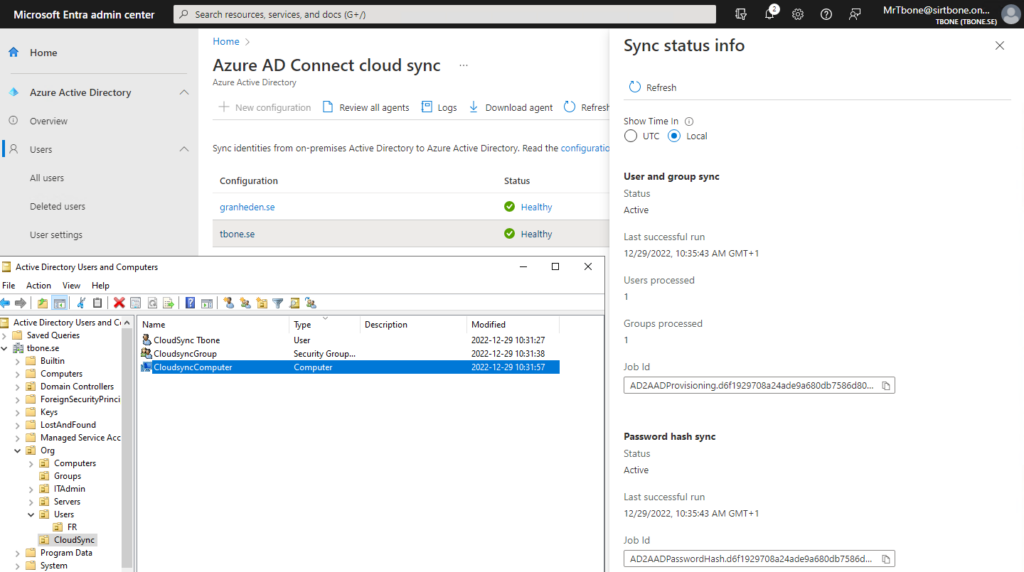
I added one user, one group and one computer to the OU in scope for Azure AD Connect Cloud Sync. The computer object was not synchronized, but that was expected behavior.
Enable Azure Ad Connect Sync Schedule
- On the server that is running Azure AD Connect sync, start the sync again by open PowerShell with Administrative Privileges and Run:
Set-ADSyncScheduler -SyncCycleEnabled $true
Start-ADSyncSyncCycle
Migrate Object to Azure Ad Connect Cloud Sync
- Move objects from OU synced by Azure AD Connect to OU synced by Azure AD Connect Cloud Sync.
- Verify that Azure AD Cloud Sync now sync the object
- Verify you don’t get duplicates or sync errors.
The user will be deleted and re-created. Moving a user from an OU that is scoped for cloud sync will be viewed as a delete operation. If the user is moved to an OU that is managed by Azure AD Connect, it will be re-provisioned to Azure AD and a new user created.
You can read more on how to pilot Azure AD Connect Cloud Sync here


