Create a Secure Workstation Image with Trusted launch enabled in Azure

We now has support for Trusted Launch VM´s in Azure. It is easy to build Azure VM´s with trusted launch from Microsoft provided gallery images. But sometimes you also want your own image with your own customizations. This guide will show you how to create a customized gallery image with trusted launch enabled. I will also deploy optimizations and security baselines to achieve a secure Workstation image.
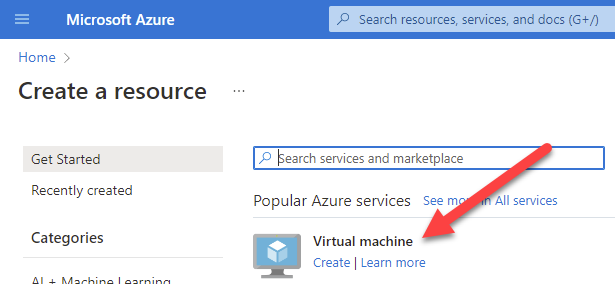
Create the VM Template
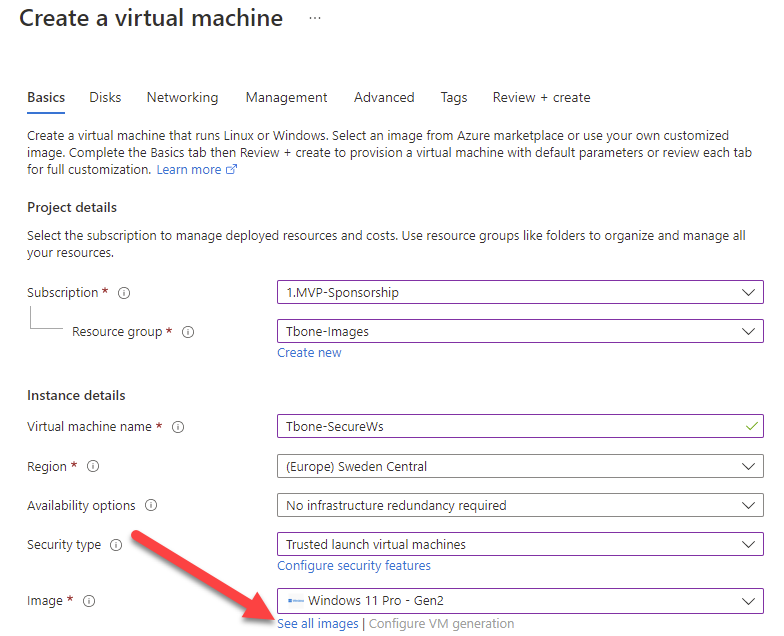
- Open Azure Portal
- Create a new Virtual Machine
- Make sure you select Trusted Launch and select a Gen2 gallery image
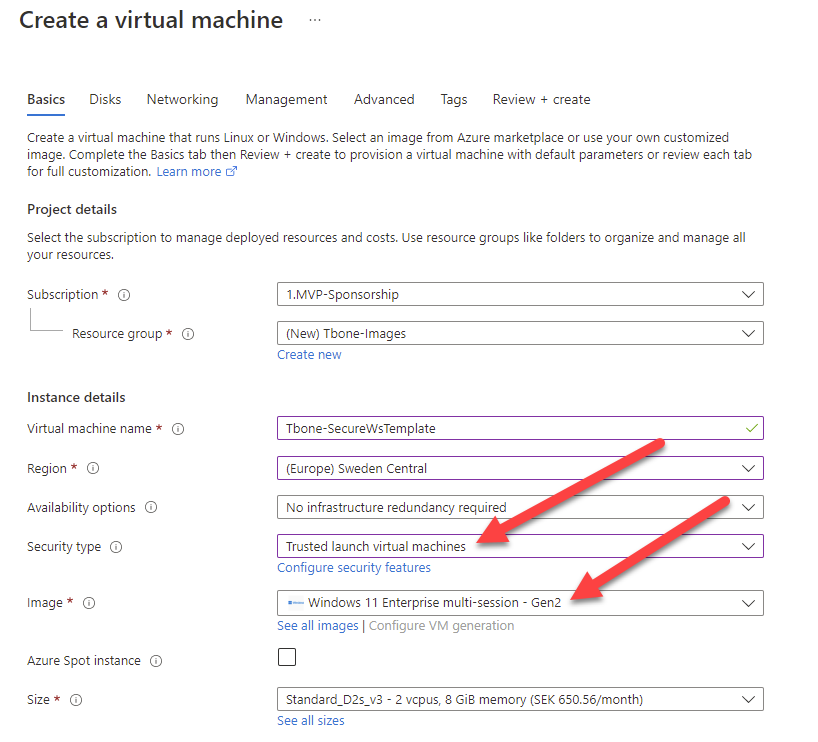
- Customize disk, network etc. with your preferences
- Make sure Trusted Launch, Secure boot and vTPM is enabled on a Gen2 image and create the VM
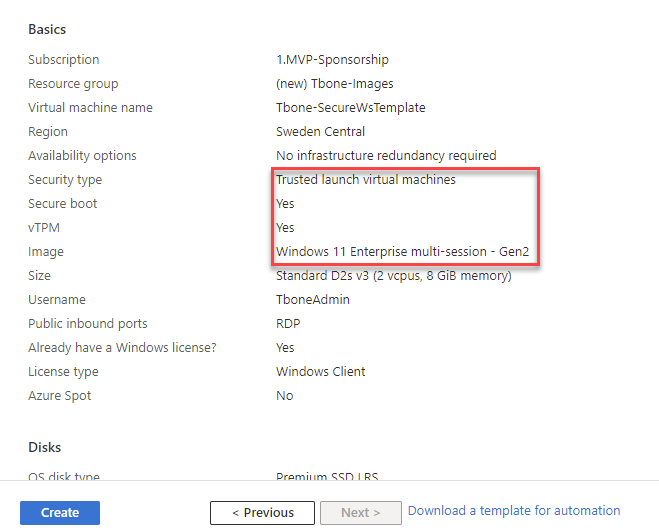
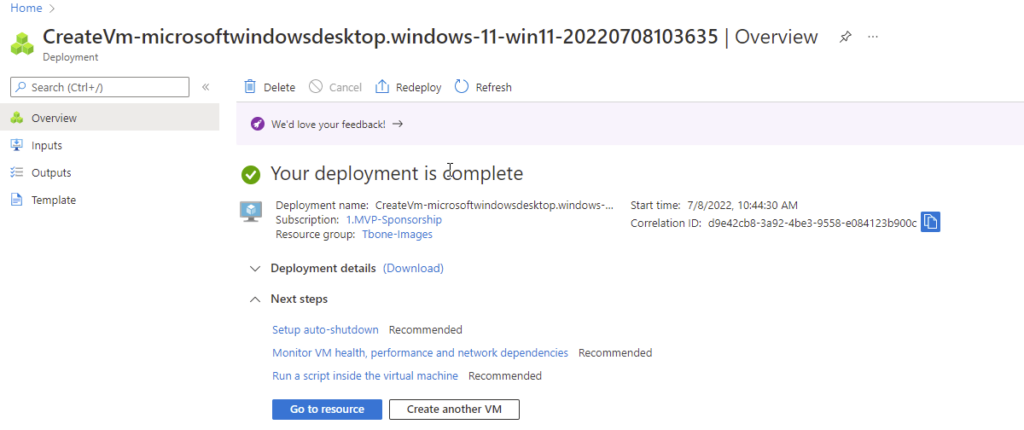
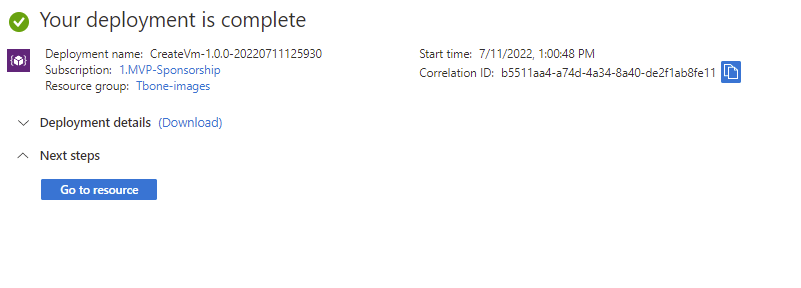
- Wait for deployment to finish successfully
Customize VM Template
- Open VM Overview by selecting Go to resource
- Connect to the VM with RDP connection.
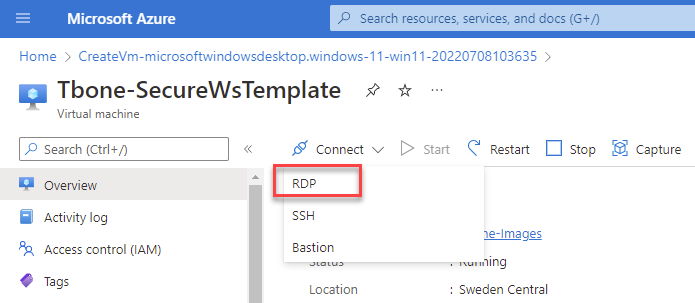
- Download the RDP file and open it up to connect.
- Start by open Settings / Windows Update and install all available updates
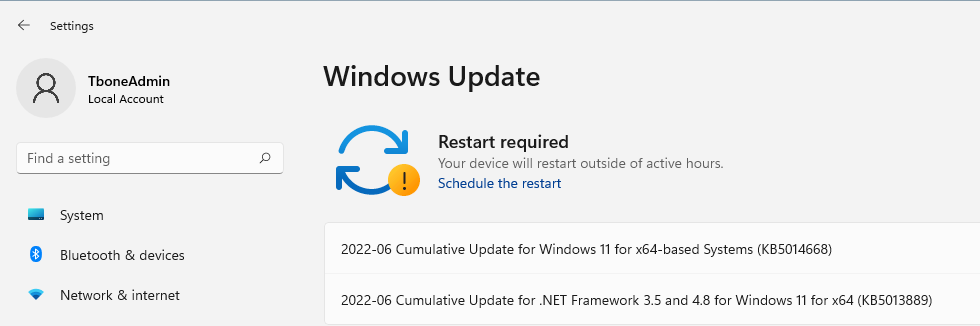
- Reboot if needed
- After reboot start Customizing your VM
You can for example run:
- Virtual Desktop Optimization Tool – to optimize performance
- Windows 11 Security Baseline – to secure Windows
- Microsoft Edge v98 Security Baseline – to secure Edge
Virtual Desktop Optimization Tool
Virtual Desktop Optimization Tool is a fantastic tool to optimize performance for a virtual machine. Often used in Azure VM´s and Azure Virtual Desktop images. Read more here
- Create a folder (ex. “D:\Optimize”).
- Download the files for Virtual Desktop Optimization Tool.
- Unblock the downloaded .zip file, either manually using File -> Properties, or using PowerShell: Unblock-File
- Extract the VDOT download to the folder previously created (ex. “D:\Optimize).
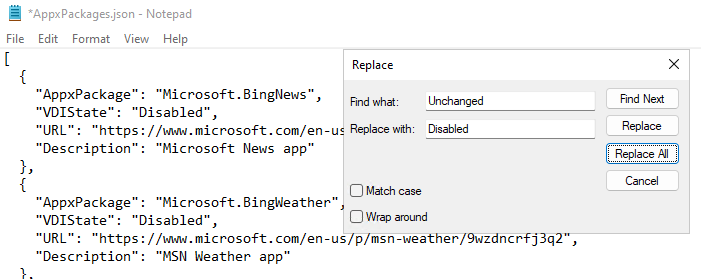
- Edit the file appxpackages.json in Virtual Desktop Optimization Tool. This file configures apps to be removed during optimization.
- Replace “UnChanged” with “Disabled” for all apps not needed.
- Start PowerShell elevated.
- In PowerShell, change directory to the scripts folder (ex. D:\Optimize).
- Run the following PowerShell command:
.\Windows_VDOT.ps1 -WindowsVersion 2009 -Optimizations Edge,All -AcceptEULA
Microsoft Edge v98 Security Baseline
- Create a folder (ex. “D:\SecureEdge”).
- Download the files for Microsoft Edge v98 Security Baseline
- Unblock the downloaded .zip file, either manually using File -> Properties, or using PowerShell: Unblock-File
- Extract the files to the folder previously created (ex. “D:\SecureEdge).
- Copy the file d:\optimize\LGPO\LGPO.exe to folder d:\SecureEdge\scripts\tools
- Start PowerShell elevated.
- In PowerShell, change directory to the scripts folder (ex. D:\SecureEdge\Scripts).
- Run the following PowerShell command:
.\Baseline-LocalInstall.ps1
Windows 11 Security Baseline
- Create a folder (ex. “D:\SecureWindows”).
- Download the files for Windows 11 Security Baseline
- Unblock the downloaded .zip file, either manually using File -> Properties, or using PowerShell: Unblock-File
- Extract the files to the folder previously created (ex. “D:\SecureWindows).
- Copy the file d:\optimize\LGPO\LGPO.exe to folder d:\SecureWindows\scripts\tools
- Start PowerShell elevated.
- In PowerShell, change directory to the scripts folder (ex. D:\SecureWindows\Scripts).
- Run the following PowerShell command:
.\Baseline-LocalInstall.ps1 -Win11NonDomainJoined
- Now you will lose access to the VM with RDP. The Security Baseline enable a firewall setting that makes RDP blocked on an Azure VM.
- Open Azure Portal
- Open the VM Template created above
- Select Run Command under Operations
- Select RunPowerShellScript
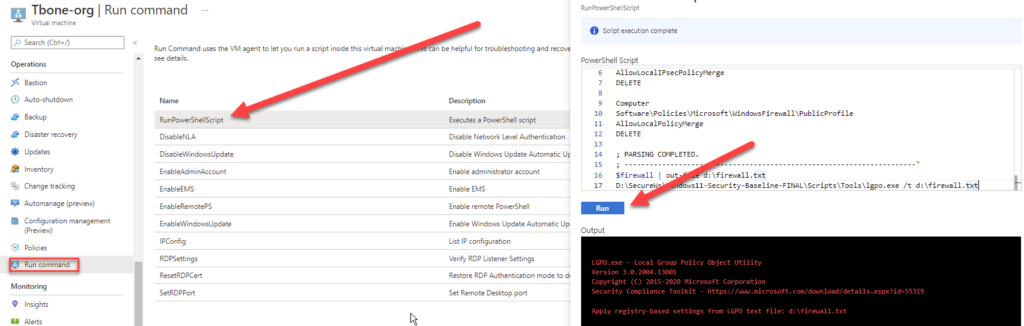
- Copy the below code into the PowerShell Script pane and click Run button
$firewall = "
; ----------------------------------------------------------------------
; PARSING Computer POLICY

Computer
Software\Policies\Microsoft\WindowsFirewall\PublicProfile
AllowLocalIPsecPolicyMerge
DELETE

Computer
Software\Policies\Microsoft\WindowsFirewall\PublicProfile
AllowLocalPolicyMerge
DELETE

; PARSING COMPLETED.
; ----------------------------------------------------------------------"
$firewall | out-file d:\firewall.txt
D:\SecureWs\Windows11-Security-Baseline-FINAL\Scripts\Tools\lgpo.exe /t d:\firewall.txt
Sysprep
To prepare the image for deployment, we need to remove all ID´s tied to the VM. This is called to generalize the windows installation.
- In the VM Template machine
- Start PowerShell elevated.
- In PowerShell, change directory to c:\windows\system32\sysprep
- Run the following PowerShell command:
.\sysprep.exe /generalize /oobe /shutdown
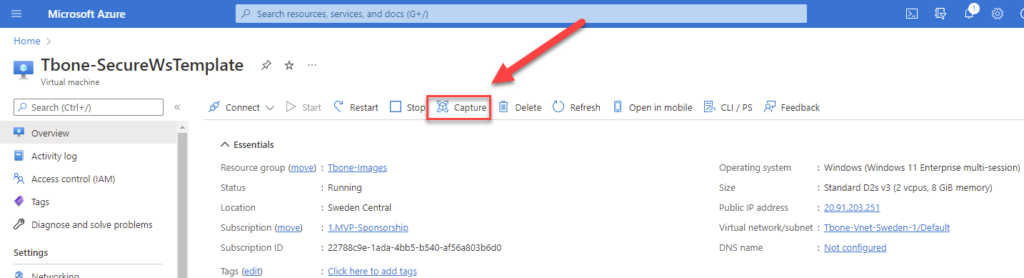
Capture the VM Template
- Open Azure Portal
- Open Overview for the VM Template created above
- Select Capture
- Enter Project details and select Automatically delete this virtual machine after creating the image
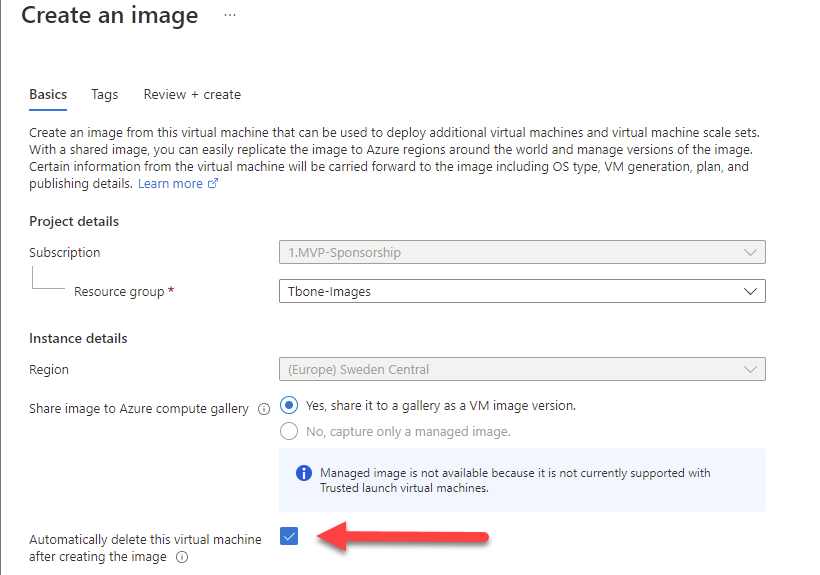
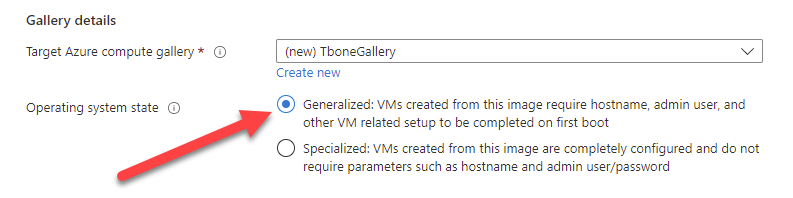
- Enter Gallery details.
- Create a new Gallery if none exist
- Select Generalized
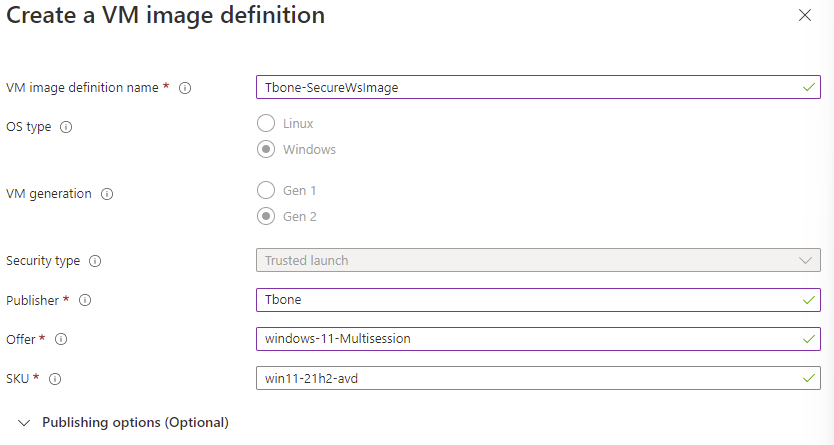
- Create a new Target VM Image Definition with preferred settings
- Enter a Version for the image
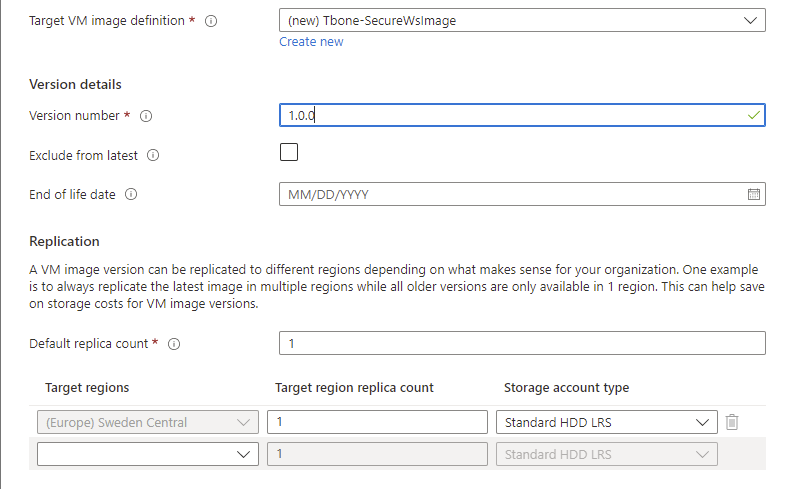
- Review and create the image
Deploy VM based on your custom gallery image
- Open Azure Portal
- Create a new Virtual Machine
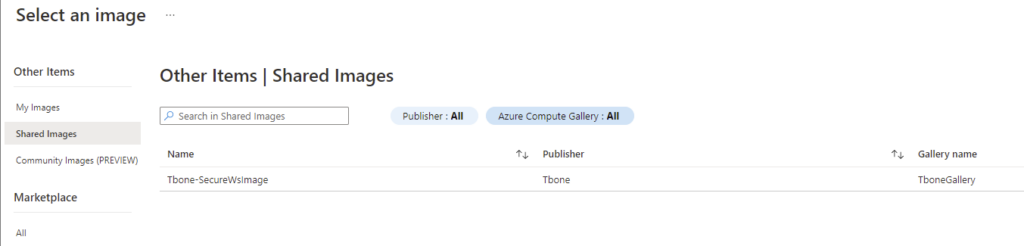
- Make sure you select Trusted Launch and click see all images
- Navigate to Shared Images
- Select your Custom Image created above
- Note that the Trusted Launch is selected and grayed out,
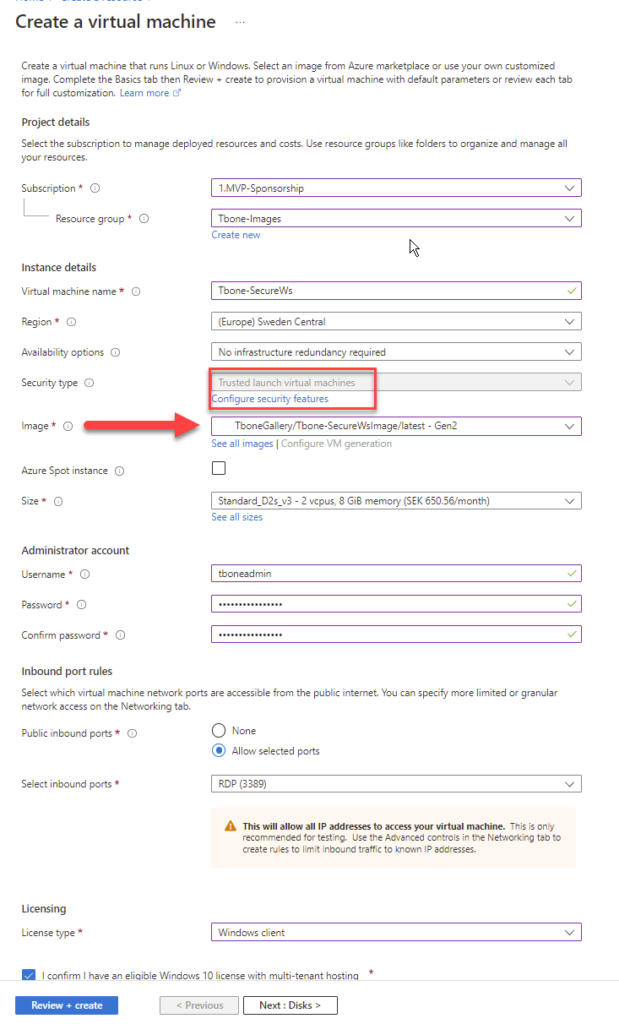
- Customize disk, network etc. with your preferences
- Make sure Trusted Launch, Secure boot and vTPM is enabled on a Gen2 image and create the VM
- Wait for deployment to finish successfully
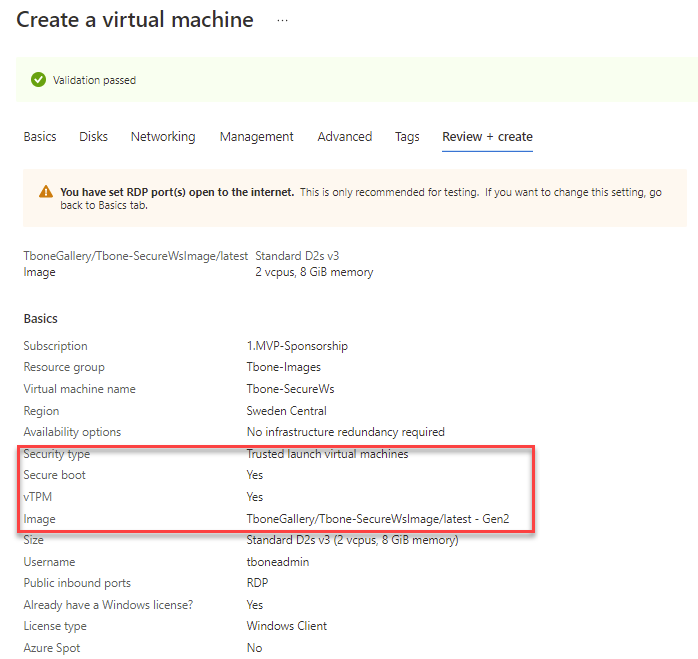
The Secure Workstation is created and Trusted Launch, Secure Boot and vTPM is enabled.