Migrate to Azure AD Connect sync V2 endpoint API
Microsoft has deployed a new endpoint (API) for Azure AD Connect that improves the performance of the synchronization service operations to Azure Active Directory. This is awesome and I really like the new development! By utilizing the new V2 endpoint, you will experience noticeable performance gains on export and import to Azure AD. This new endpoint supports the following:
- syncing groups with up to 250k members
- performance gains on export and import to Azure AD
A new release of AADConnect is planned for January 2021. This release will use the V2 end point by default and will enable syncing groups larger than 50K without any additional configuration.
Swing Migration
Microsoft recommend using a swing migration when migrating to the new V2 endpoint
- Deploy the V2 endpoint on the current staging server.
- Validate that the V2 server is still processing imports as expected.
- Once validation is complete, switch the V2 server to be the active server and the V1 server to be the staging server.
- Validate that the V2 server is performing and processing large groups successfully. It is good to stay in this state and monitor the synchronization process for a period before deciding on a rollback.
- Once you are confident in using the V2 endpoint, upgrade also the V1 server to begin using the V2 endpoint.
Step by Step – Migrate to Azure AD Connect sync V2 endpoint API
Step 1 Update Ad Connect Server(s)
First, make sure to upgrade your AD connect to the latest version Azure AD Connect
Step 2 Enable V2 endpoint API
- Open a PowerShell prompt as administrator.
- Disable the sync scheduler:
Set-ADSyncScheduler -SyncCycleEnabled $false- Import the new powershell module for AD connect extensions:
Import-Module 'C:\Program Files\Microsoft Azure AD Sync\Extensions\AADConnector.psm1'- Switch to the new V2 endpoint API on both export and import connector:
Set-ADSyncAADConnectorExportApiVersion 2
Set-ADSyncAADConnectorImportApiVersion 2
Step 3 (Optional) increase the group membership limit
If you use large groups, you also need to increase the group membership limit. Microsoft recommends to first raise the membership limit to a slightly higher value, e g. 75K members, to see the larger groups syncing to Azure AD. Once you are satisfied with the results you can further raise the member limit. The maximum limit is 250K members per group.
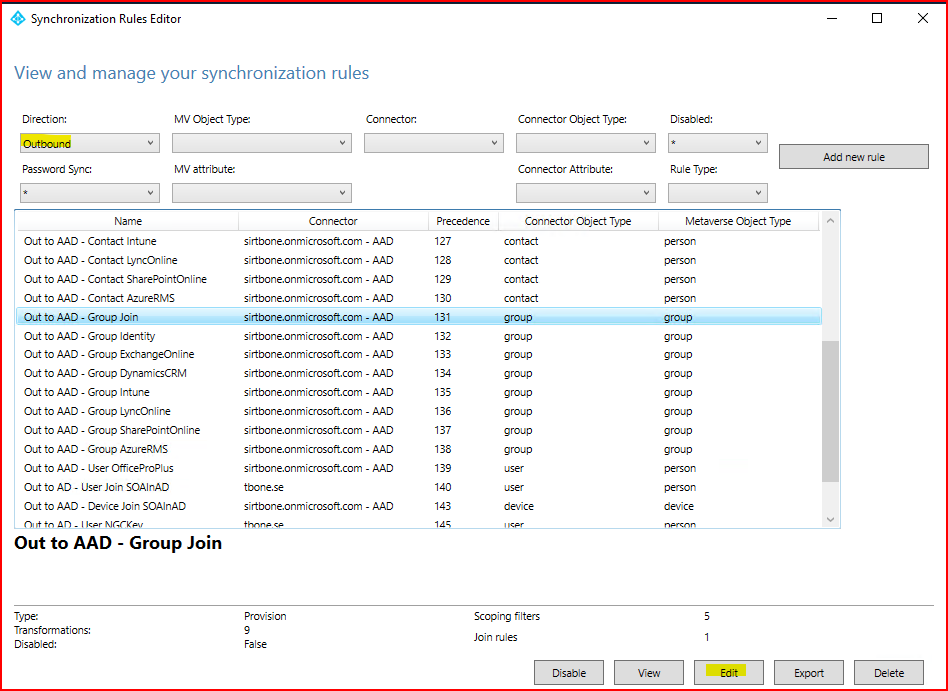
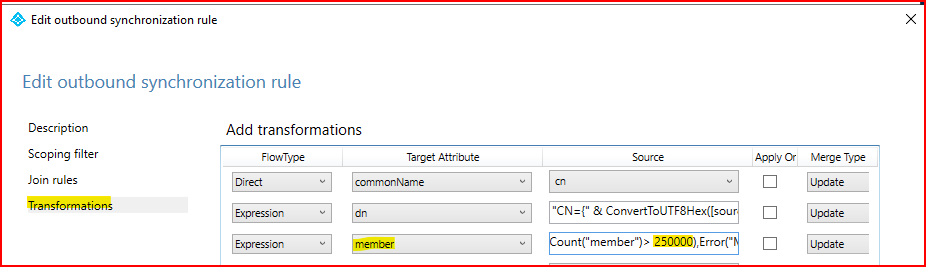
- Open Azure AD Synchronization Rules Editor
- In the editor, choose Outbound for Direction
- Select the Out to AAD – Group Join sync rule
- Click the Edit button
- Click the Yes button to disable the default rule and create an editable copy.
- In the pop-up window on the Description page, set the precedence to 99
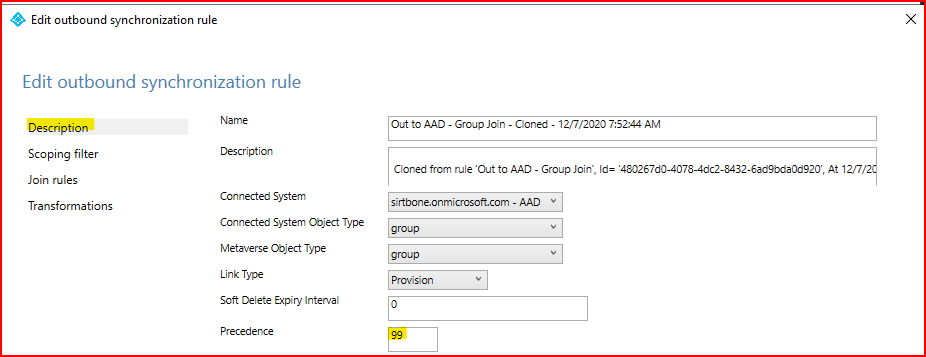
- On the Transformations page, change the Source value by replacing ‘50000’ with a value between 50001 and 250000.
IIF((ValueCount(“member”)> 250000),Error(“Maximum Group member count exceeded”),IgnoreThisFlow)
- Save the rule
Finally Enable the sync
- Go back to the PowerShell prompt
- Enable the Sync Scheduler with this command:
Set-ADSyncScheduler -SyncCycleEnabled $true3. Verify the next full sync by monitoring:
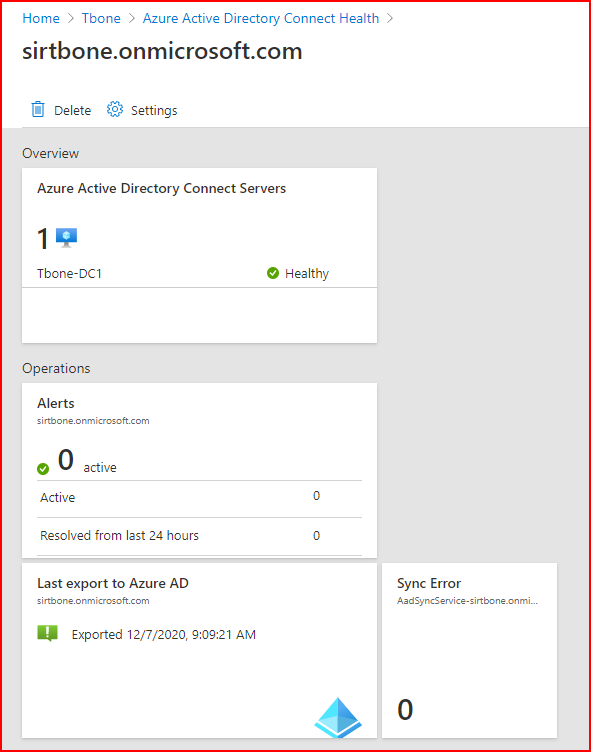
- Azure AD Connect Health
- Event log
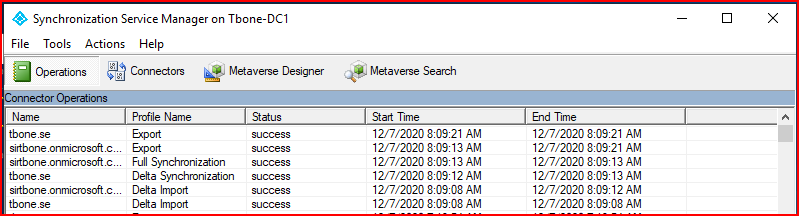
- Azure AD Connect Synchronization Service
The new V2 endpoint code handles some types of export errors slightly different from how the V1 code did. You may see more of the informational error messages when you use the V2 endpoint.
After enabling the new endpoint, you may see additional export errors on the AAD connector with name ‘dn-attributes-failure’. There will be a corresponding event log entry for each error with id 6949. The errors are informational and do not indicate a problem with your installation, but rather that the sync process could not add certain members to a group in Azure AD because the member object itself was not synced to Azure AD.
Rollback
If you have enabled the v2 endpoint and need to rollback, follow these steps:
- Open an admin PowerShell prompt:
- Disable the sync scheduler and switch back to the V1 endpoint::
Set-ADSyncScheduler -SyncCycleEnabled $false
Import-Module 'C:\Program Files\Microsoft Azure AD Sync\Extensions\AADConnector.psm1'
Set-ADSyncAADConnectorExportApiVersion 1
Set-ADSyncAADConnectorImportApiVersion 1- Open Azure AD Synchronization Rules Editor
- Delete the editable copy of the Out to AAD – Group Join sync rule
- Enable the default copy of the Out to AAD – Group Join sync rule
- Re-enable the Sync Scheduler
Set-ADSyncScheduler -SyncCycleEnabled $true