Deploy Progressive Web App (PWA) with Intune
I’m working with a customer that needed to deploy a PWA application to all their users. But in Intune there is no PWA to select when deploying apps. So how do we deploy them?
Progressive Web Applications (PWA)
PWA are apps built with web technologies like HTML, CSS, JavaScript, etc. But they have the feel and functionality of an actual native app. Many of the web based applications we are using today are PWAs. We only need to “convert” them into apps. The shortcut can also be populated to start menu, taskbar and desktop for easy access.
How to manually create a PWA?
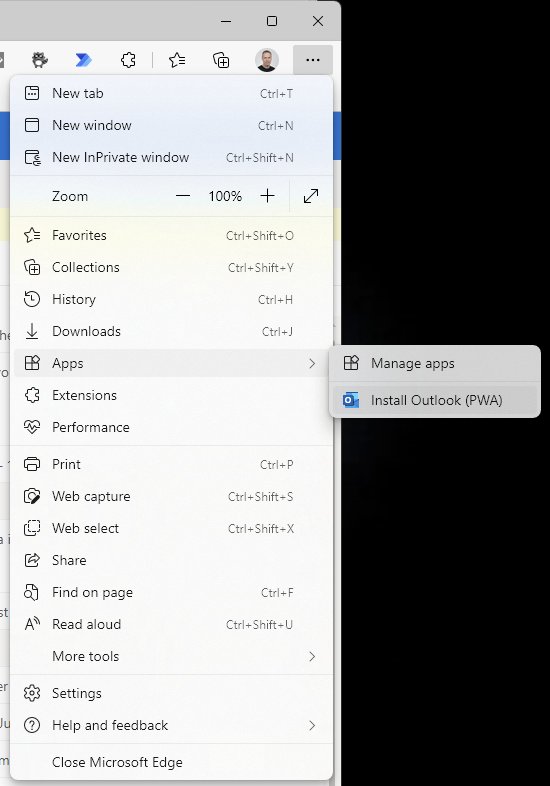
- Open Outlook Web App https://outlook.office.com/mail/
- In Edge select the three dots in the upper right corner …
- Select Apps and select Install Outlook (PWA) (sometimes show Install this site as an app)
- Select to Install
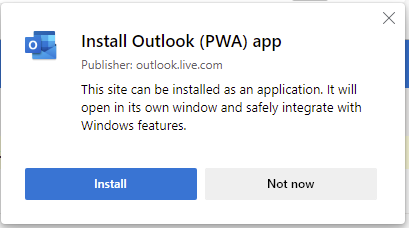
- Select where to put the shortcuts for the PWA application
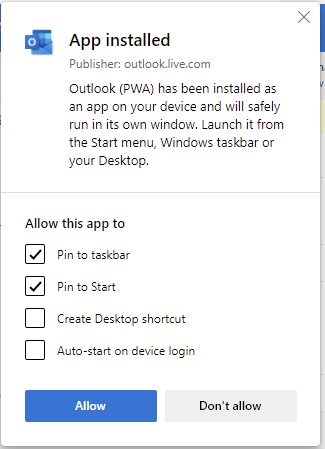
That´s it, now you can start OWA from startmenu as an installed PWA app.
Deploy PWA with Intune
Now it´s time to deploy this little app with Intune. It´s a bit awkward, but that’s because it´s tied closely to Edge. We do not have to deploy the application bits, we need to tell Edge to build and install the application on the remote host.
- Open MEM portal
- Select Devices
- Select Configuration Profiles
- Select Create Profile to create a new Configuration Profile
- This is a config for Windows 10 and later and the setting exist in the new “Settings catalog” so we use that.
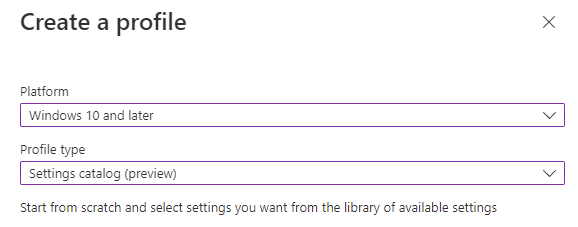
- Enter a name and description for your config profile and then Next
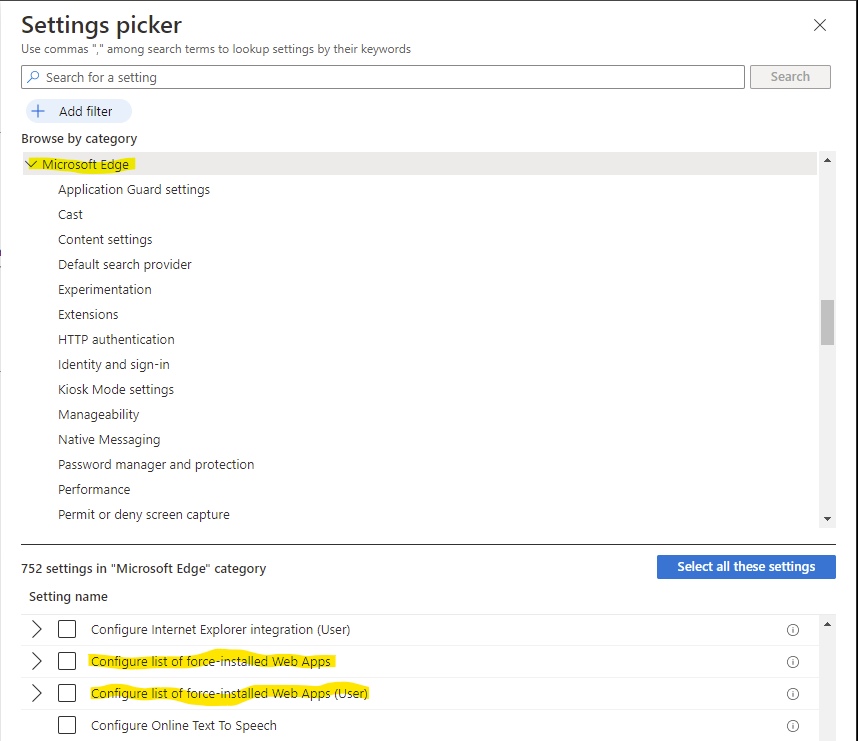
- Click Add Settings
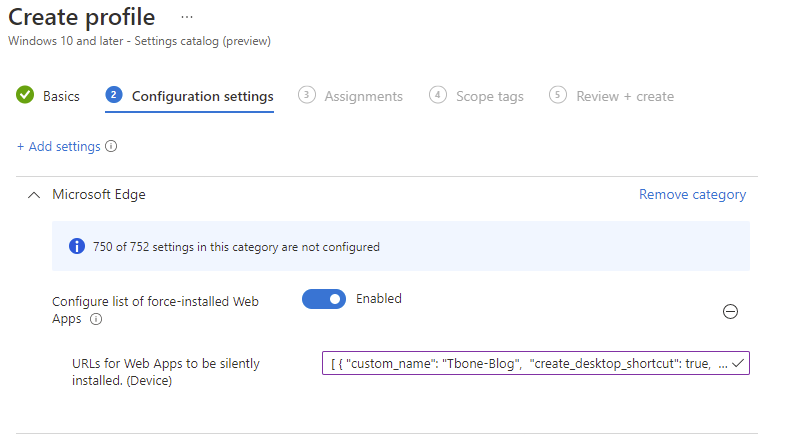
- Scroll down and select category Microsoft Edge
- Scroll down and select Configure list of force-installed Web Apps (settings can apply at the user level or device level)
Now we need to provide a JSON string to deploy and configure the app. It can contain:
Reference
- custom_name = Name of the App (Not the shortcuts)
- create_desktop_shortcut = True or False
- default_launch_container = Window or Browser Tab
- url = The site
- fallback_app_name = Custom Shortcut name (otherwise it will be the sites name)
- custom_icon (Allows you to override the app icon of installed apps.)
Example of JSON to deploy a custom app:
[
{ "custom_name": "Tbone-Blog",
 "create_desktop_shortcut": true,
 "default_launch_container": "window",
 "url": "https://www.tbone.se/" }
]- Enter the JSON sting in the setting for URLs for Web Apps to be silently installed. (Device)
- Select Assignments for this config and create the Profile
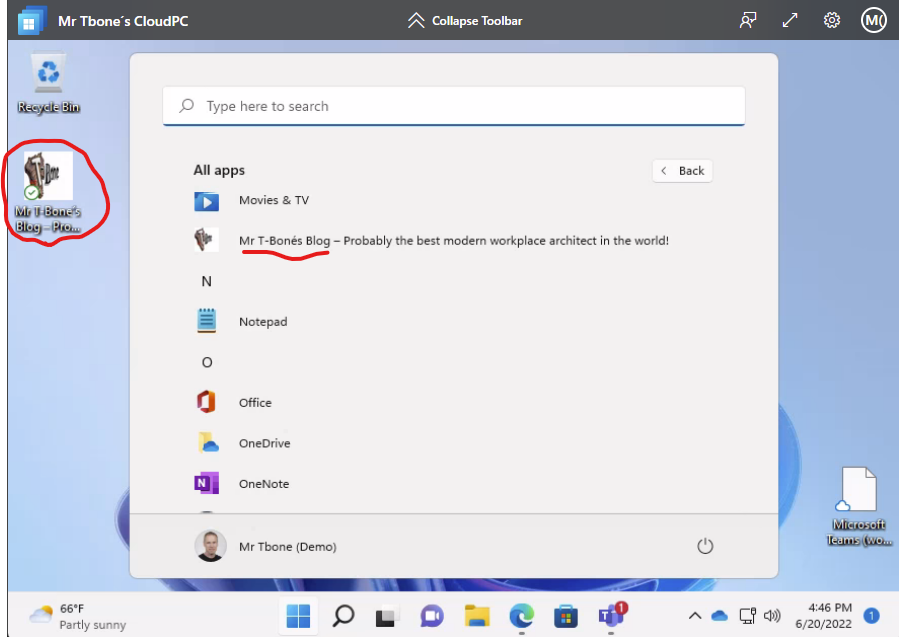
End User Experience
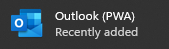
When the user get this policy the shortcut to the app will pop up on their desktop and in the start menu:
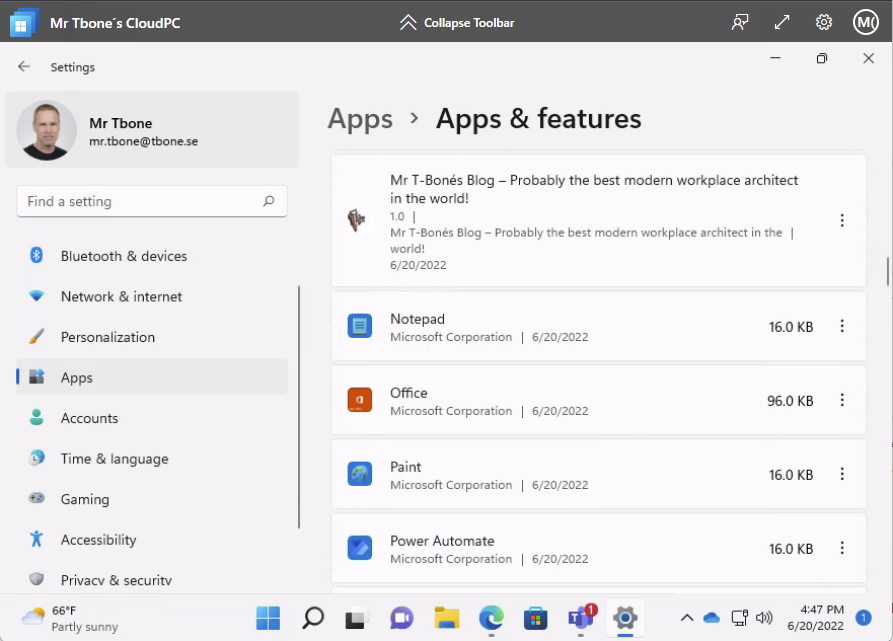
It will also show up in settings as an installed app:
When opening the app, it will look and feel more like an application rather than a webpage: